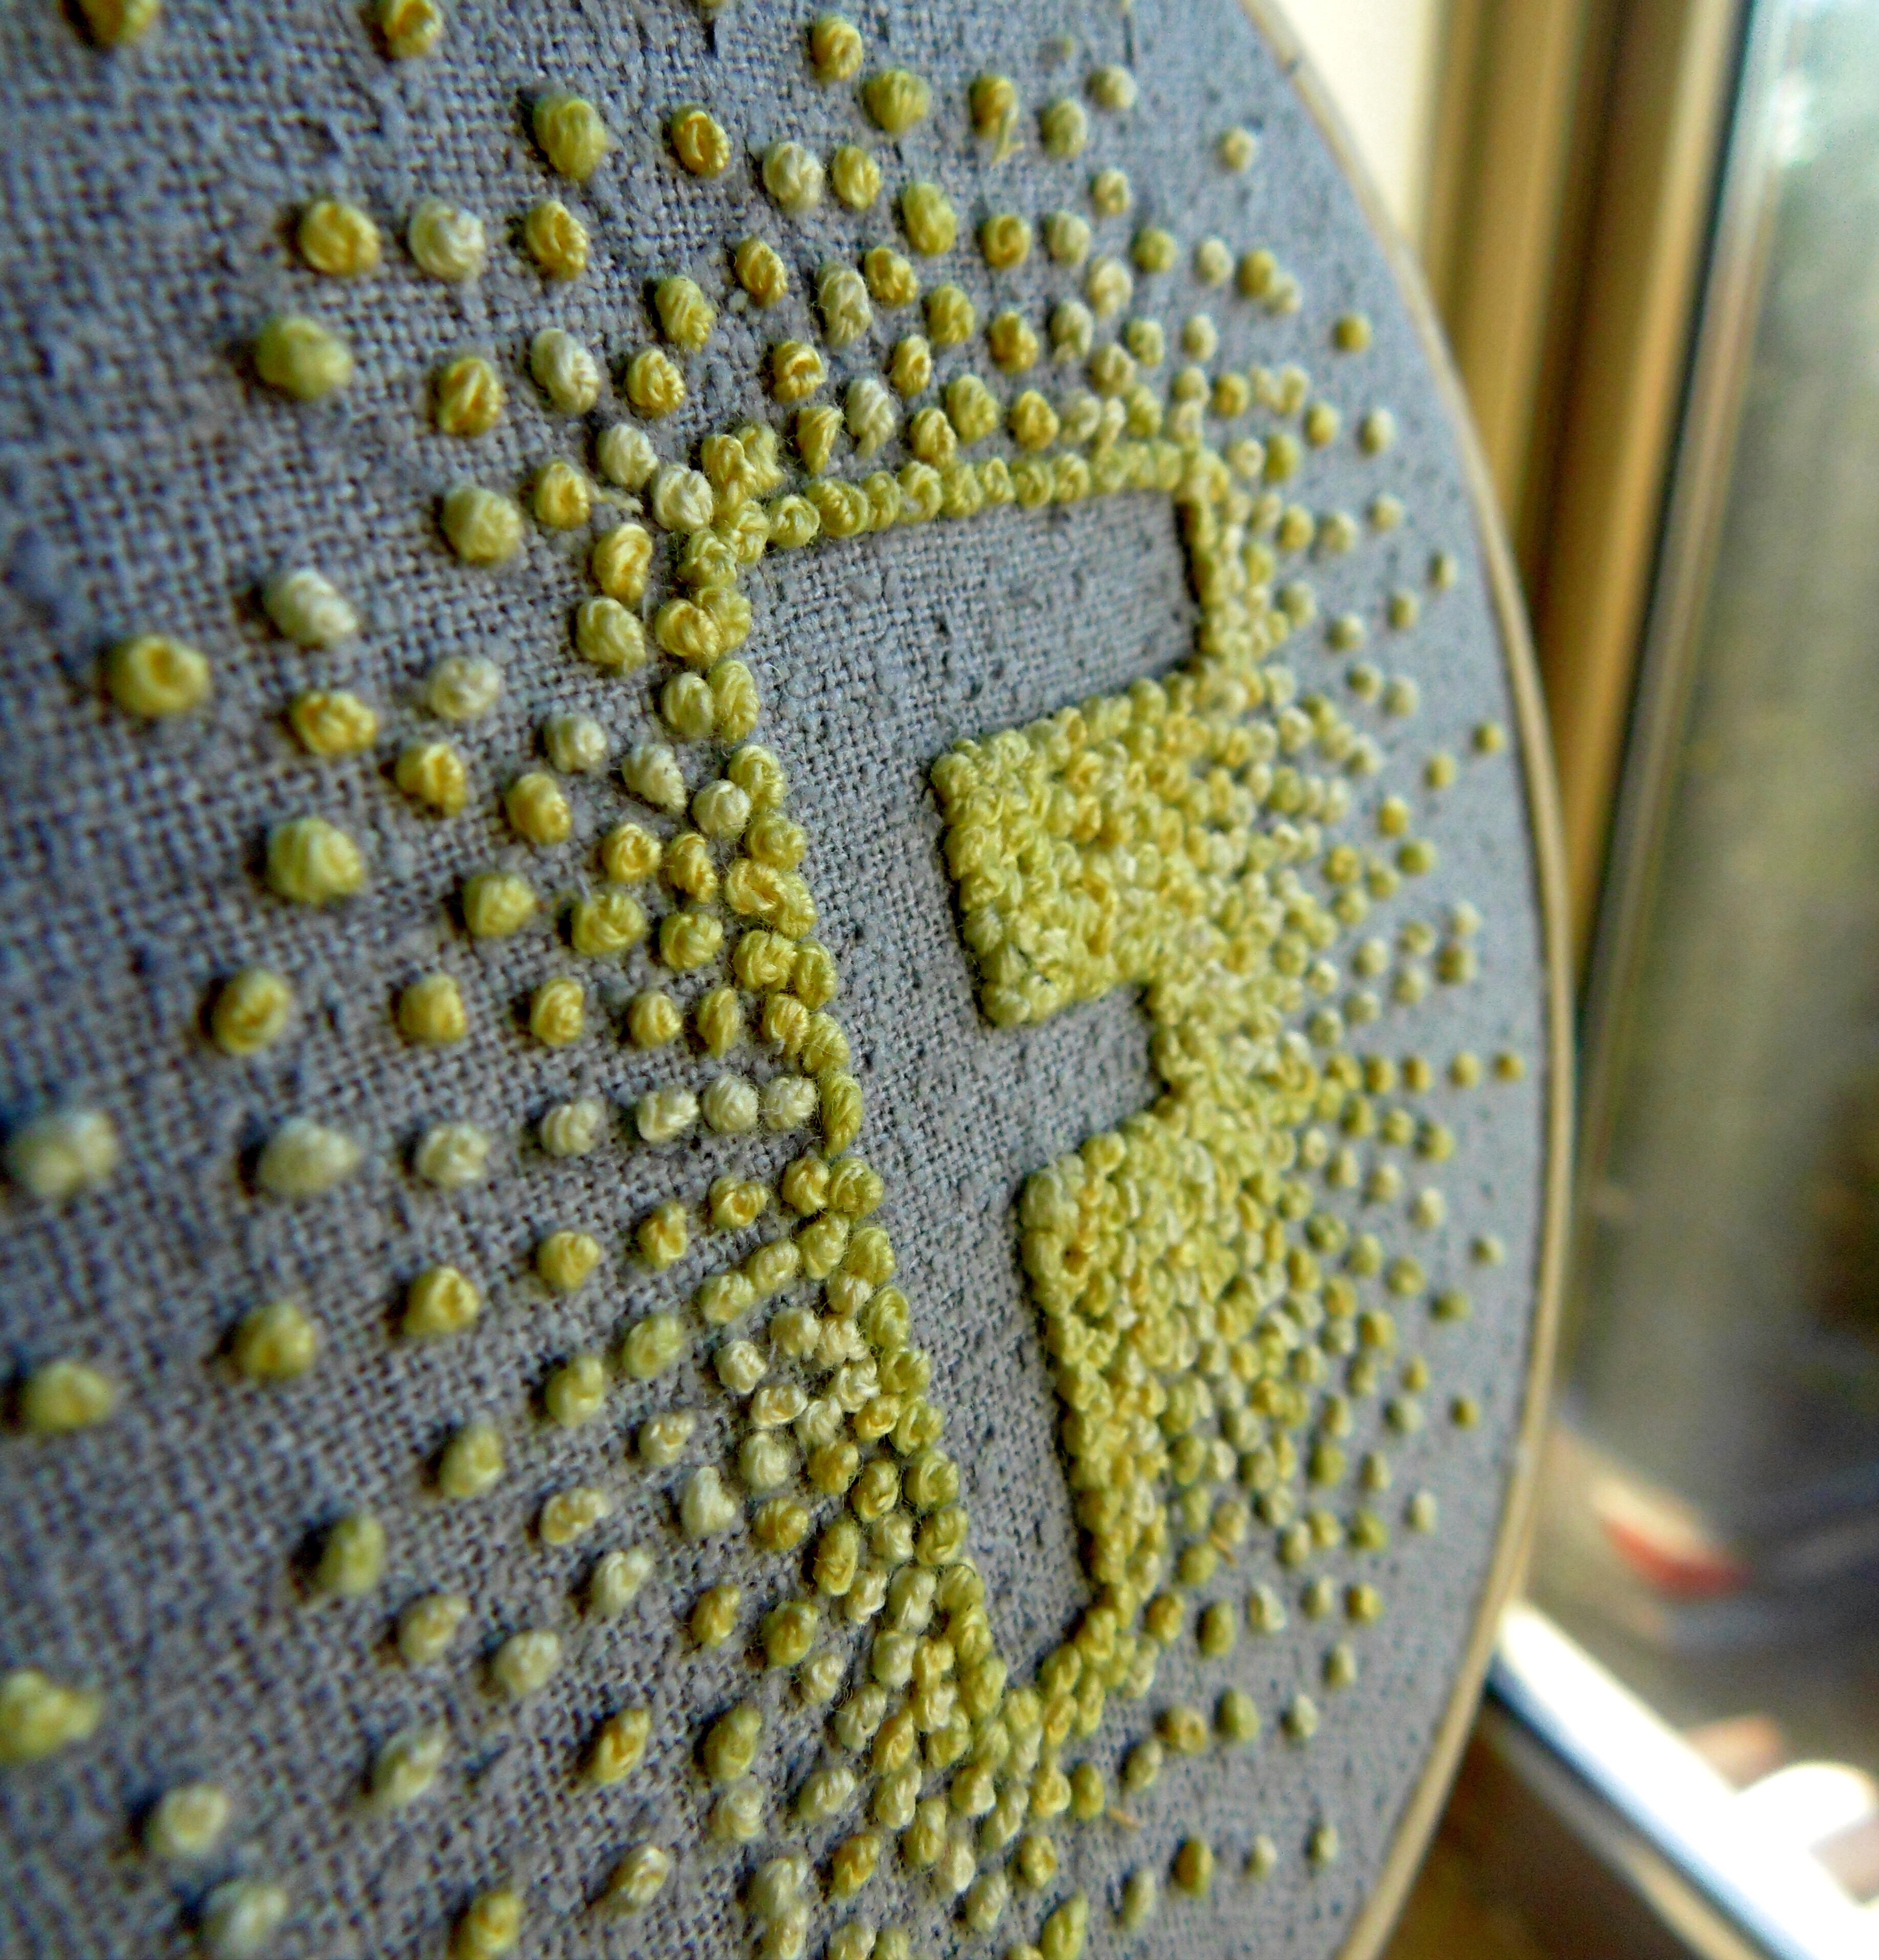
In recent weeks I have posted a number of pictures of projects, here and on IG, that have mostly been made up of French Knots. It is one of those stitches that seems to provoke a reaction, even amongst experienced stitchers. A couple of people have asked me what the secret to successful French Knots might be.
It got me thinking about what method I actually use to make them. It was surprisingly difficult! I think I have stitched so many of them it has become entirely intuitive – I make them without really being aware what I am doing. It wasn’t always the case, I used to struggle horribly with French Knots. It was all a bit hit and miss, with some turning out beautifully, some not making a knot at all and others sitting away from the fabric meaning they would wobble about in a most unsatisfactory fashion! Now, however, I seem to have found a method that works nicely for me. I persevered with thinking through how I stitched French Knots and made a note of my method. I then had a look at few online tutorials and was surprised to find that the method I use was a bit different to many of them. This prompted to me to have a go at sharing my method for making French Knots.
I would just like to add a couple of notes before I share this method (I am reluctant to call it a tutorial because that assumes a level of expertise which I don’t feel I have!). Firstly, I am sure that this method is not original or in any way peculiar to me. I fully expect many to tell me that they have stitched French Knots this way for years! Second, I have never tried sharing a stitching technique before so I apologise now for the quality of the pictures or the instructions! Lastly, the apartment we have taken since moving to Italy, has no dishwasher (words can’t describe how much I miss my dishwasher!) so despite slathering my hands with huge amounts of hand cream, they look so rough!!
OK, self indulgent wittering over. Let’s do this!
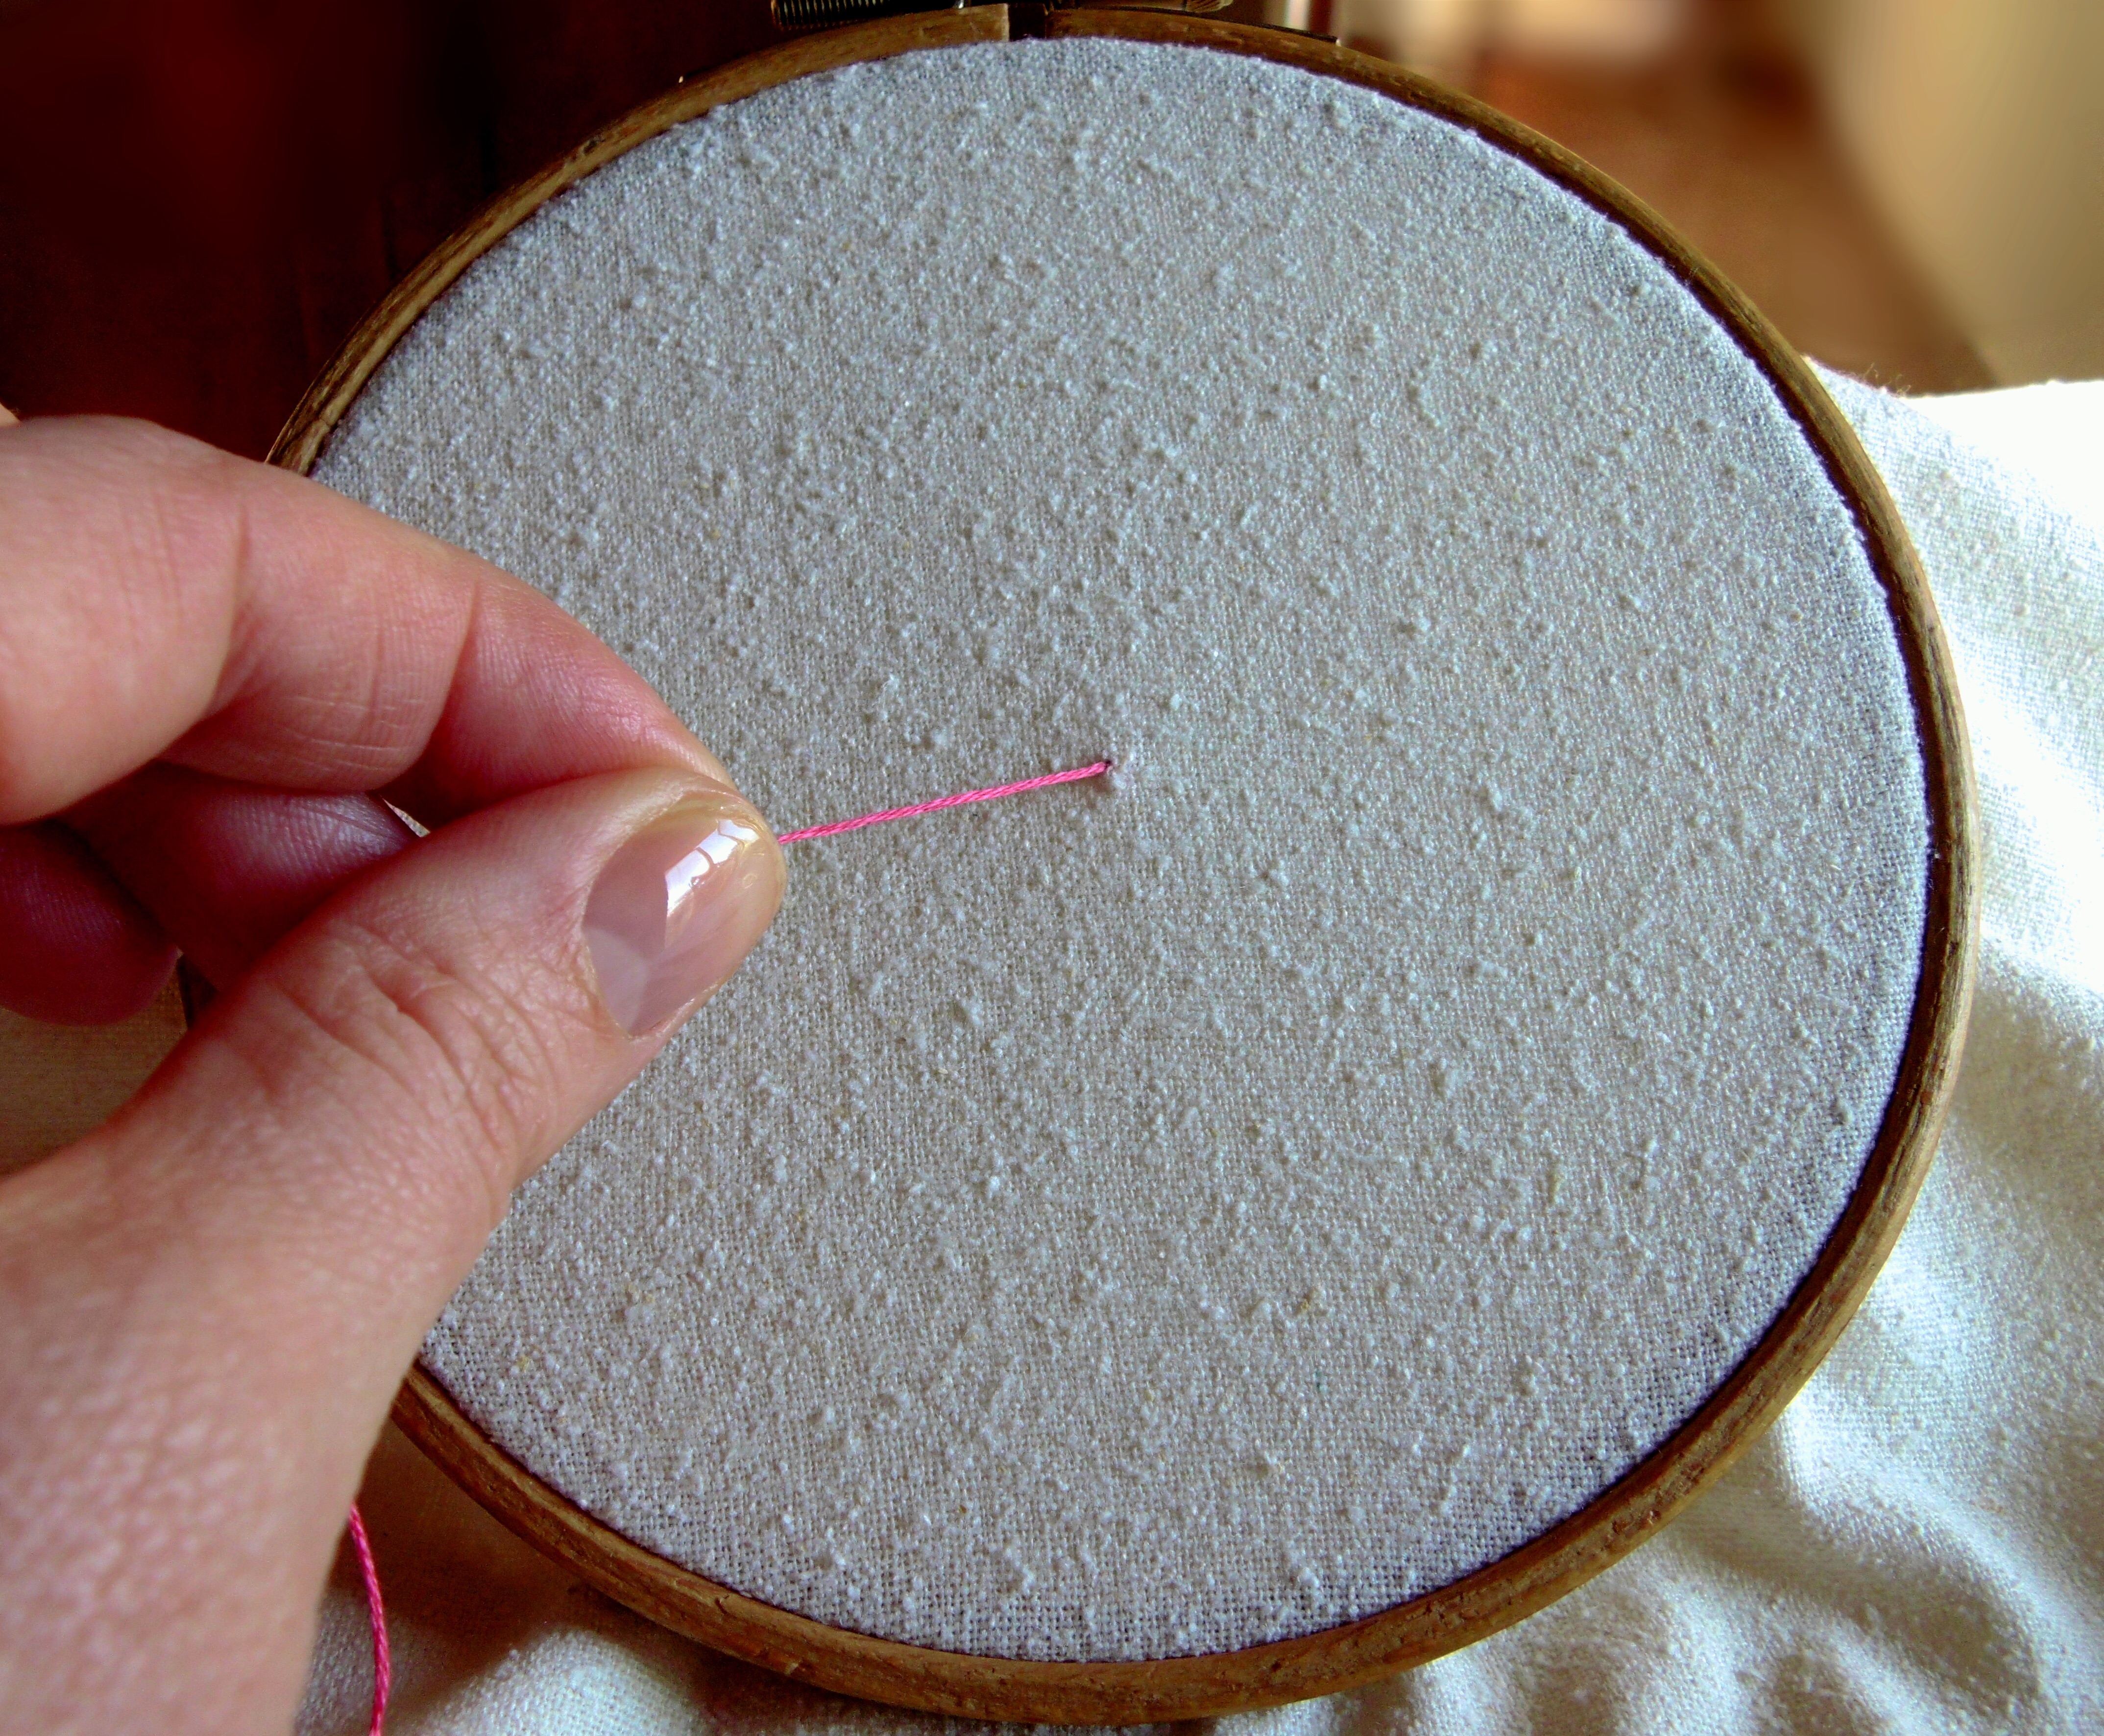
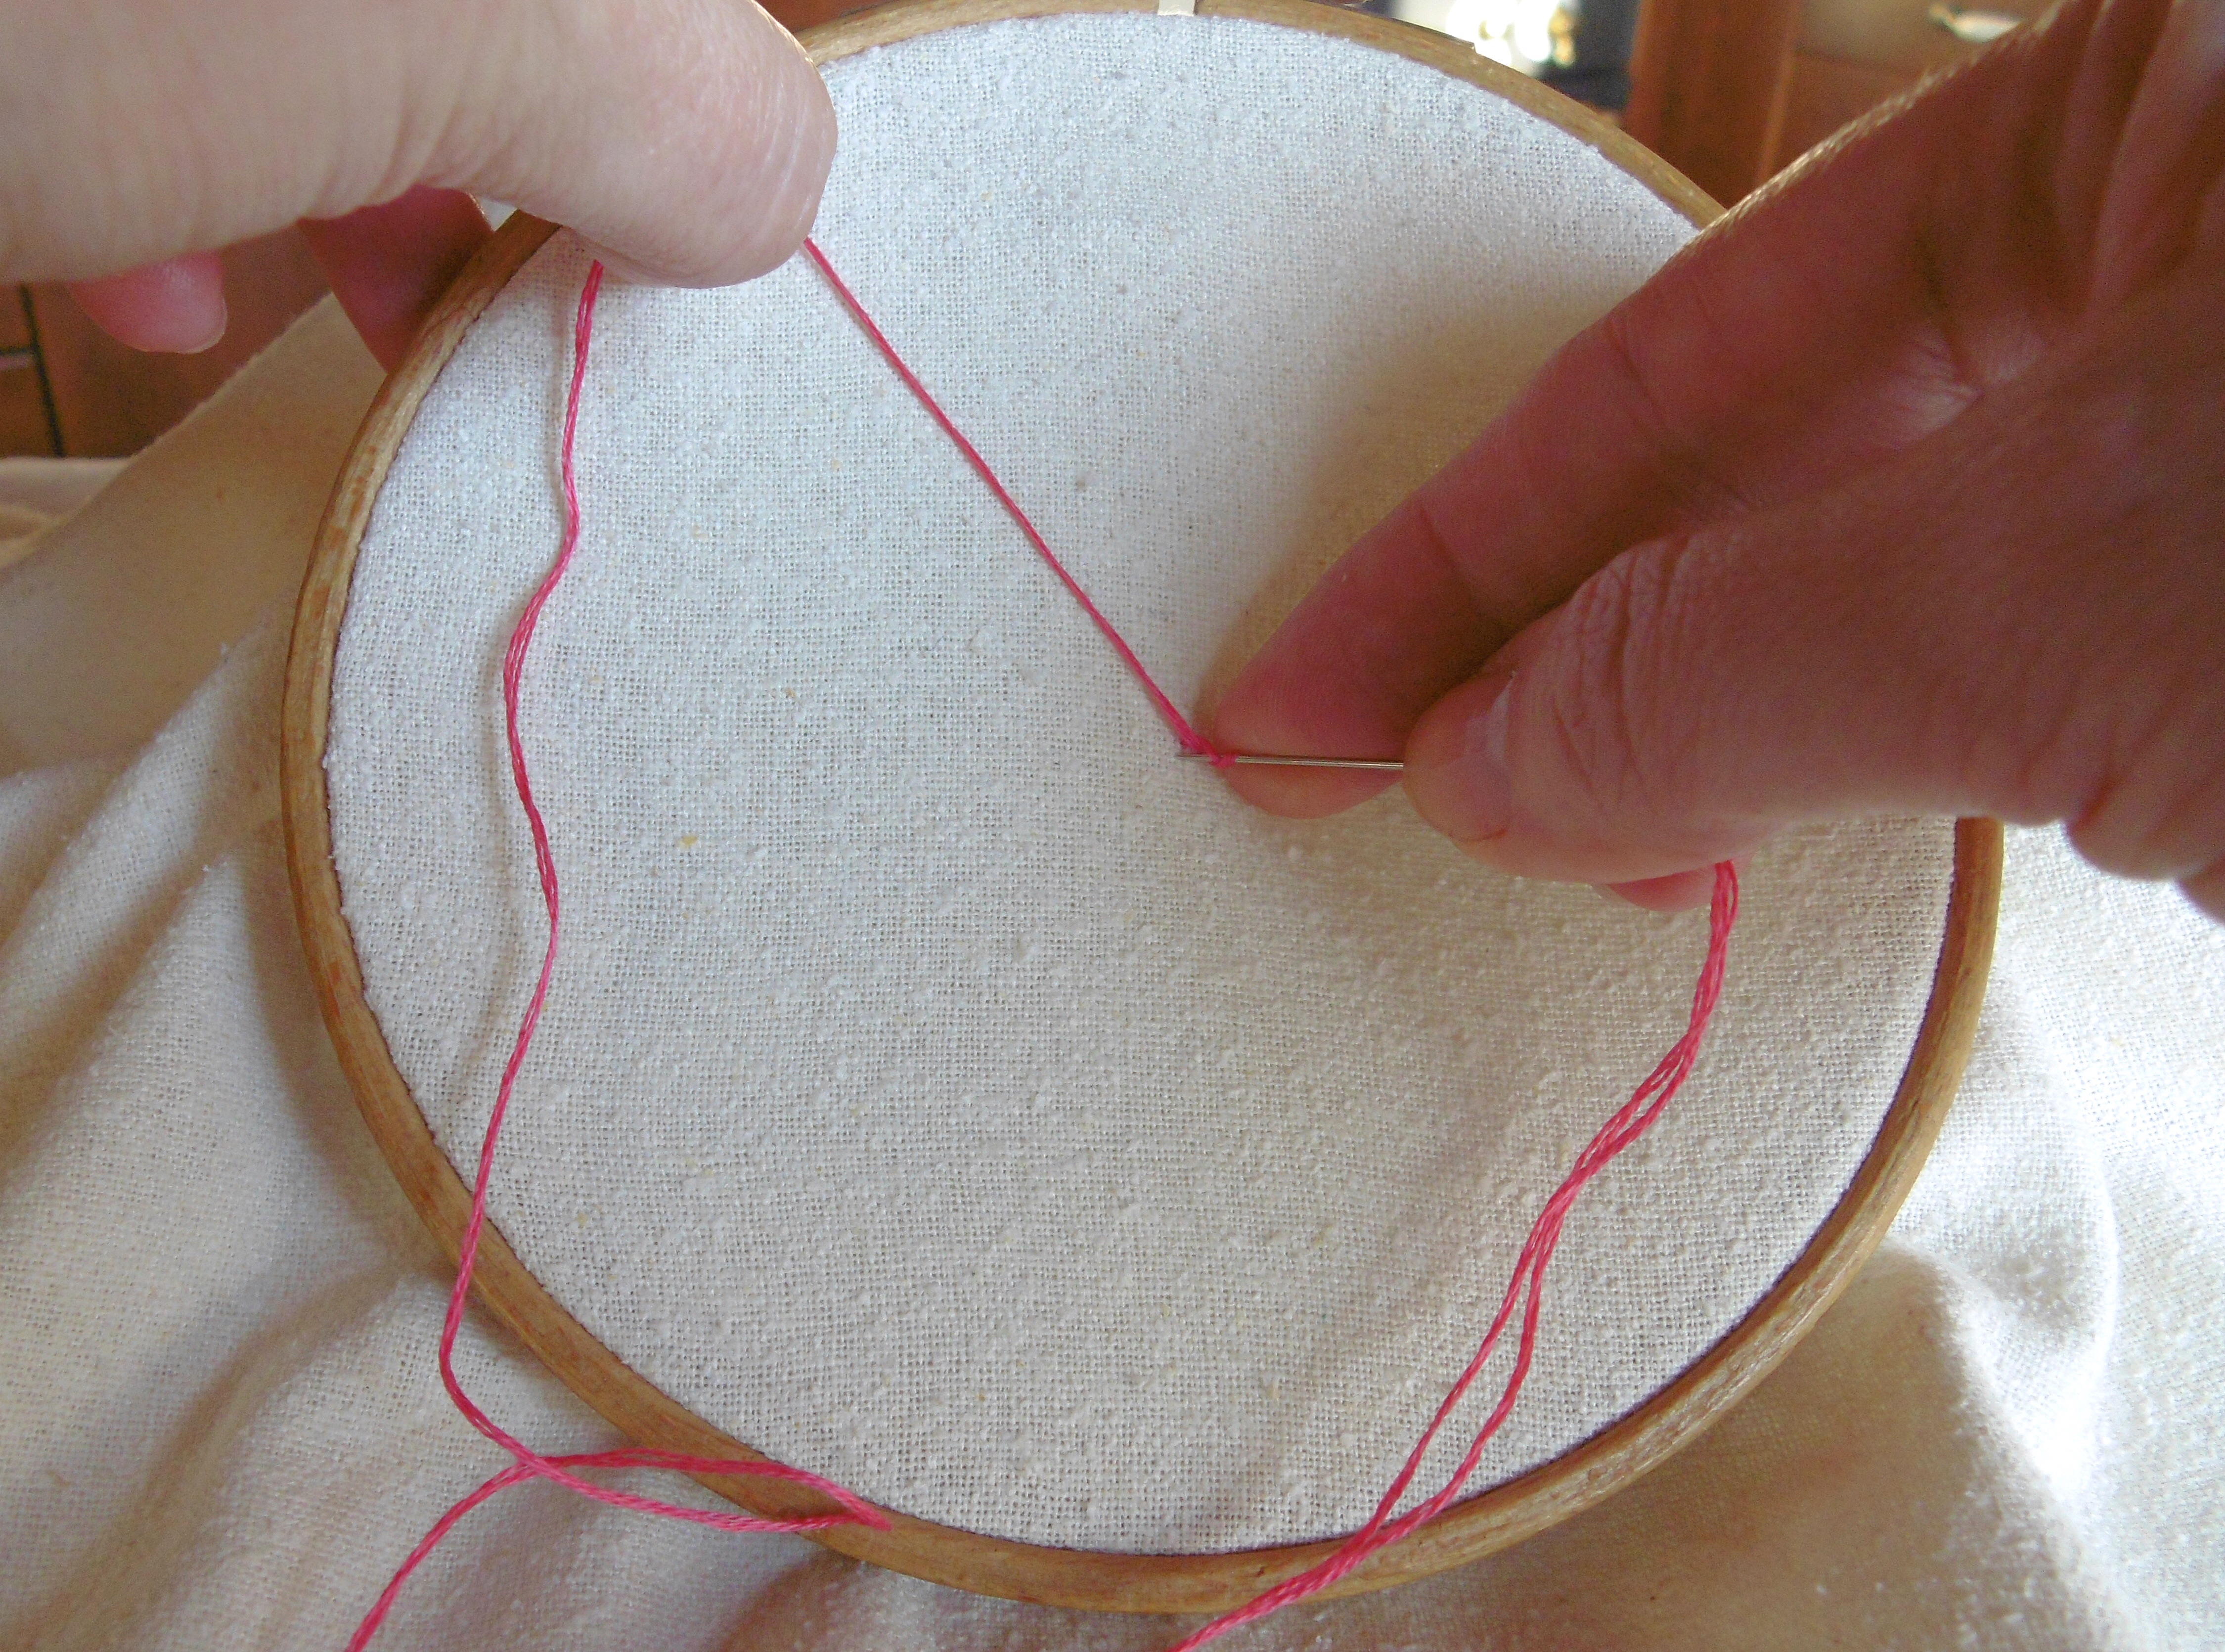
So, the key to a successful French Knot is making sure that you pull the floss nice and taut.
Bring your needle to the left of the floss as in the picture above.
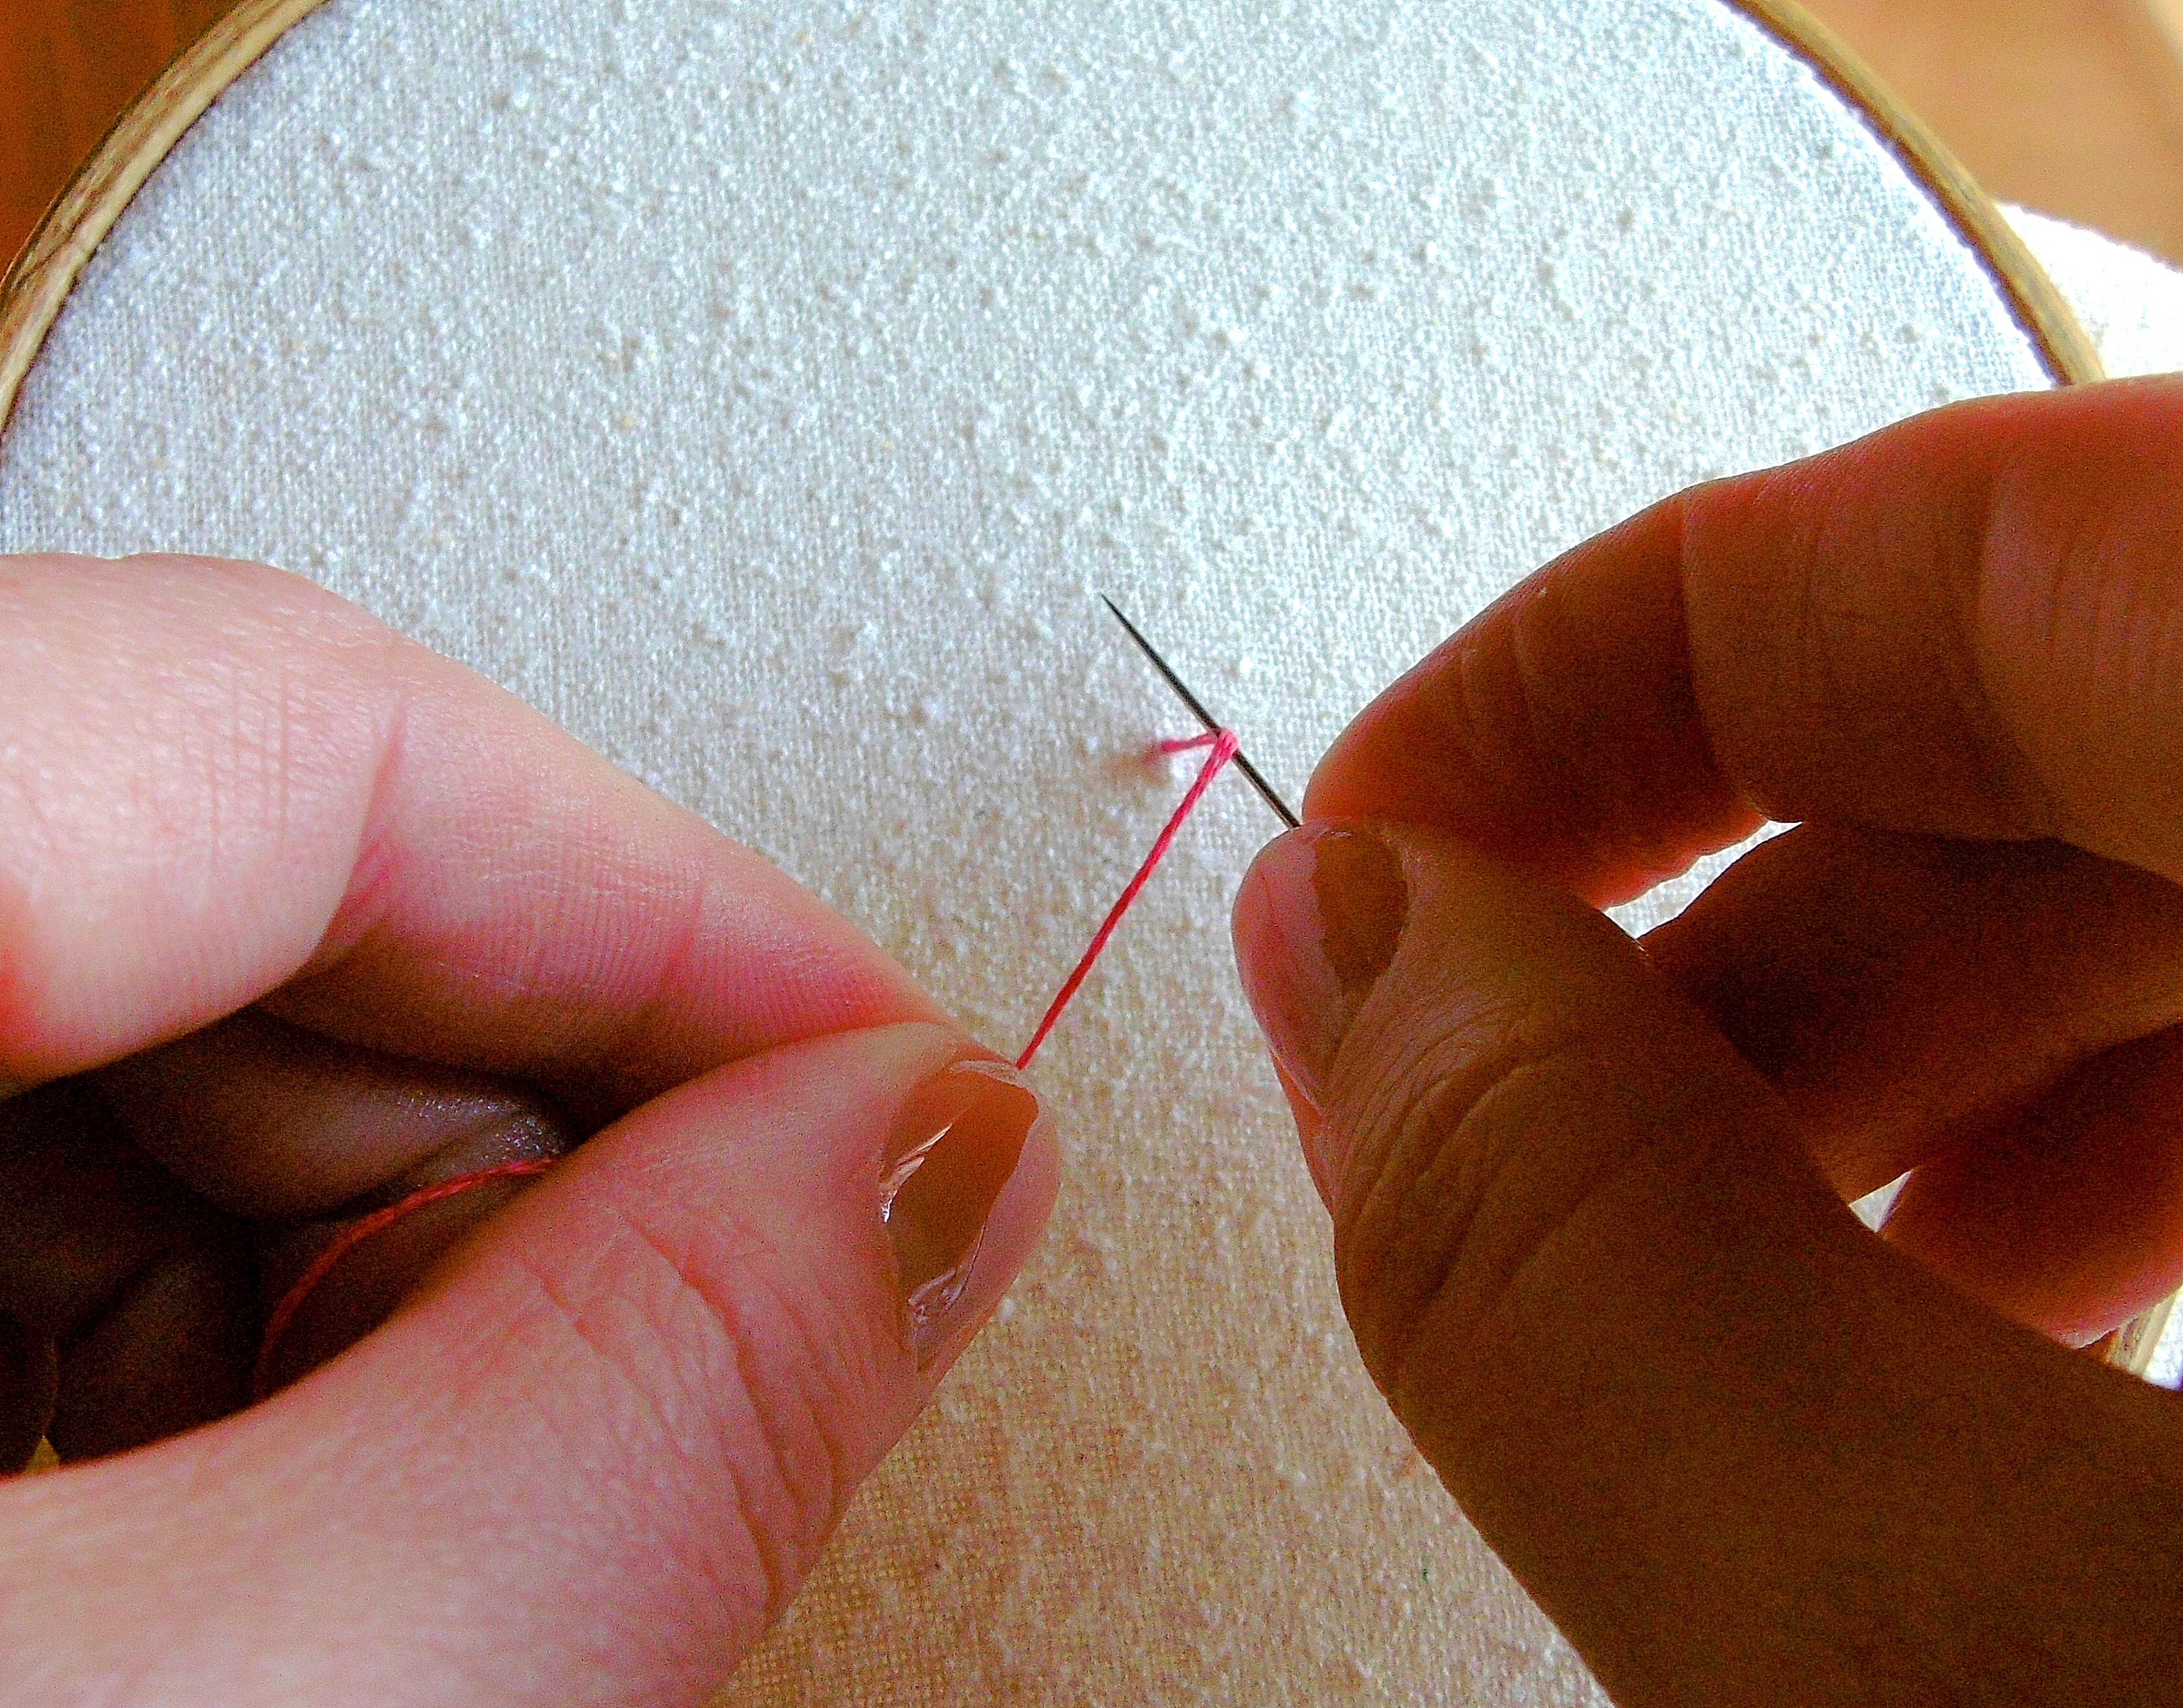
With the point of the needle facing down, rotate the needle clockwise once around the floss so that it looks like the picture above. I find this works better than wrapping the floss around the needle because it ensures the needle stays pointing in the direction you’re going to want it to go which helps to keep the knot close to the fabric.

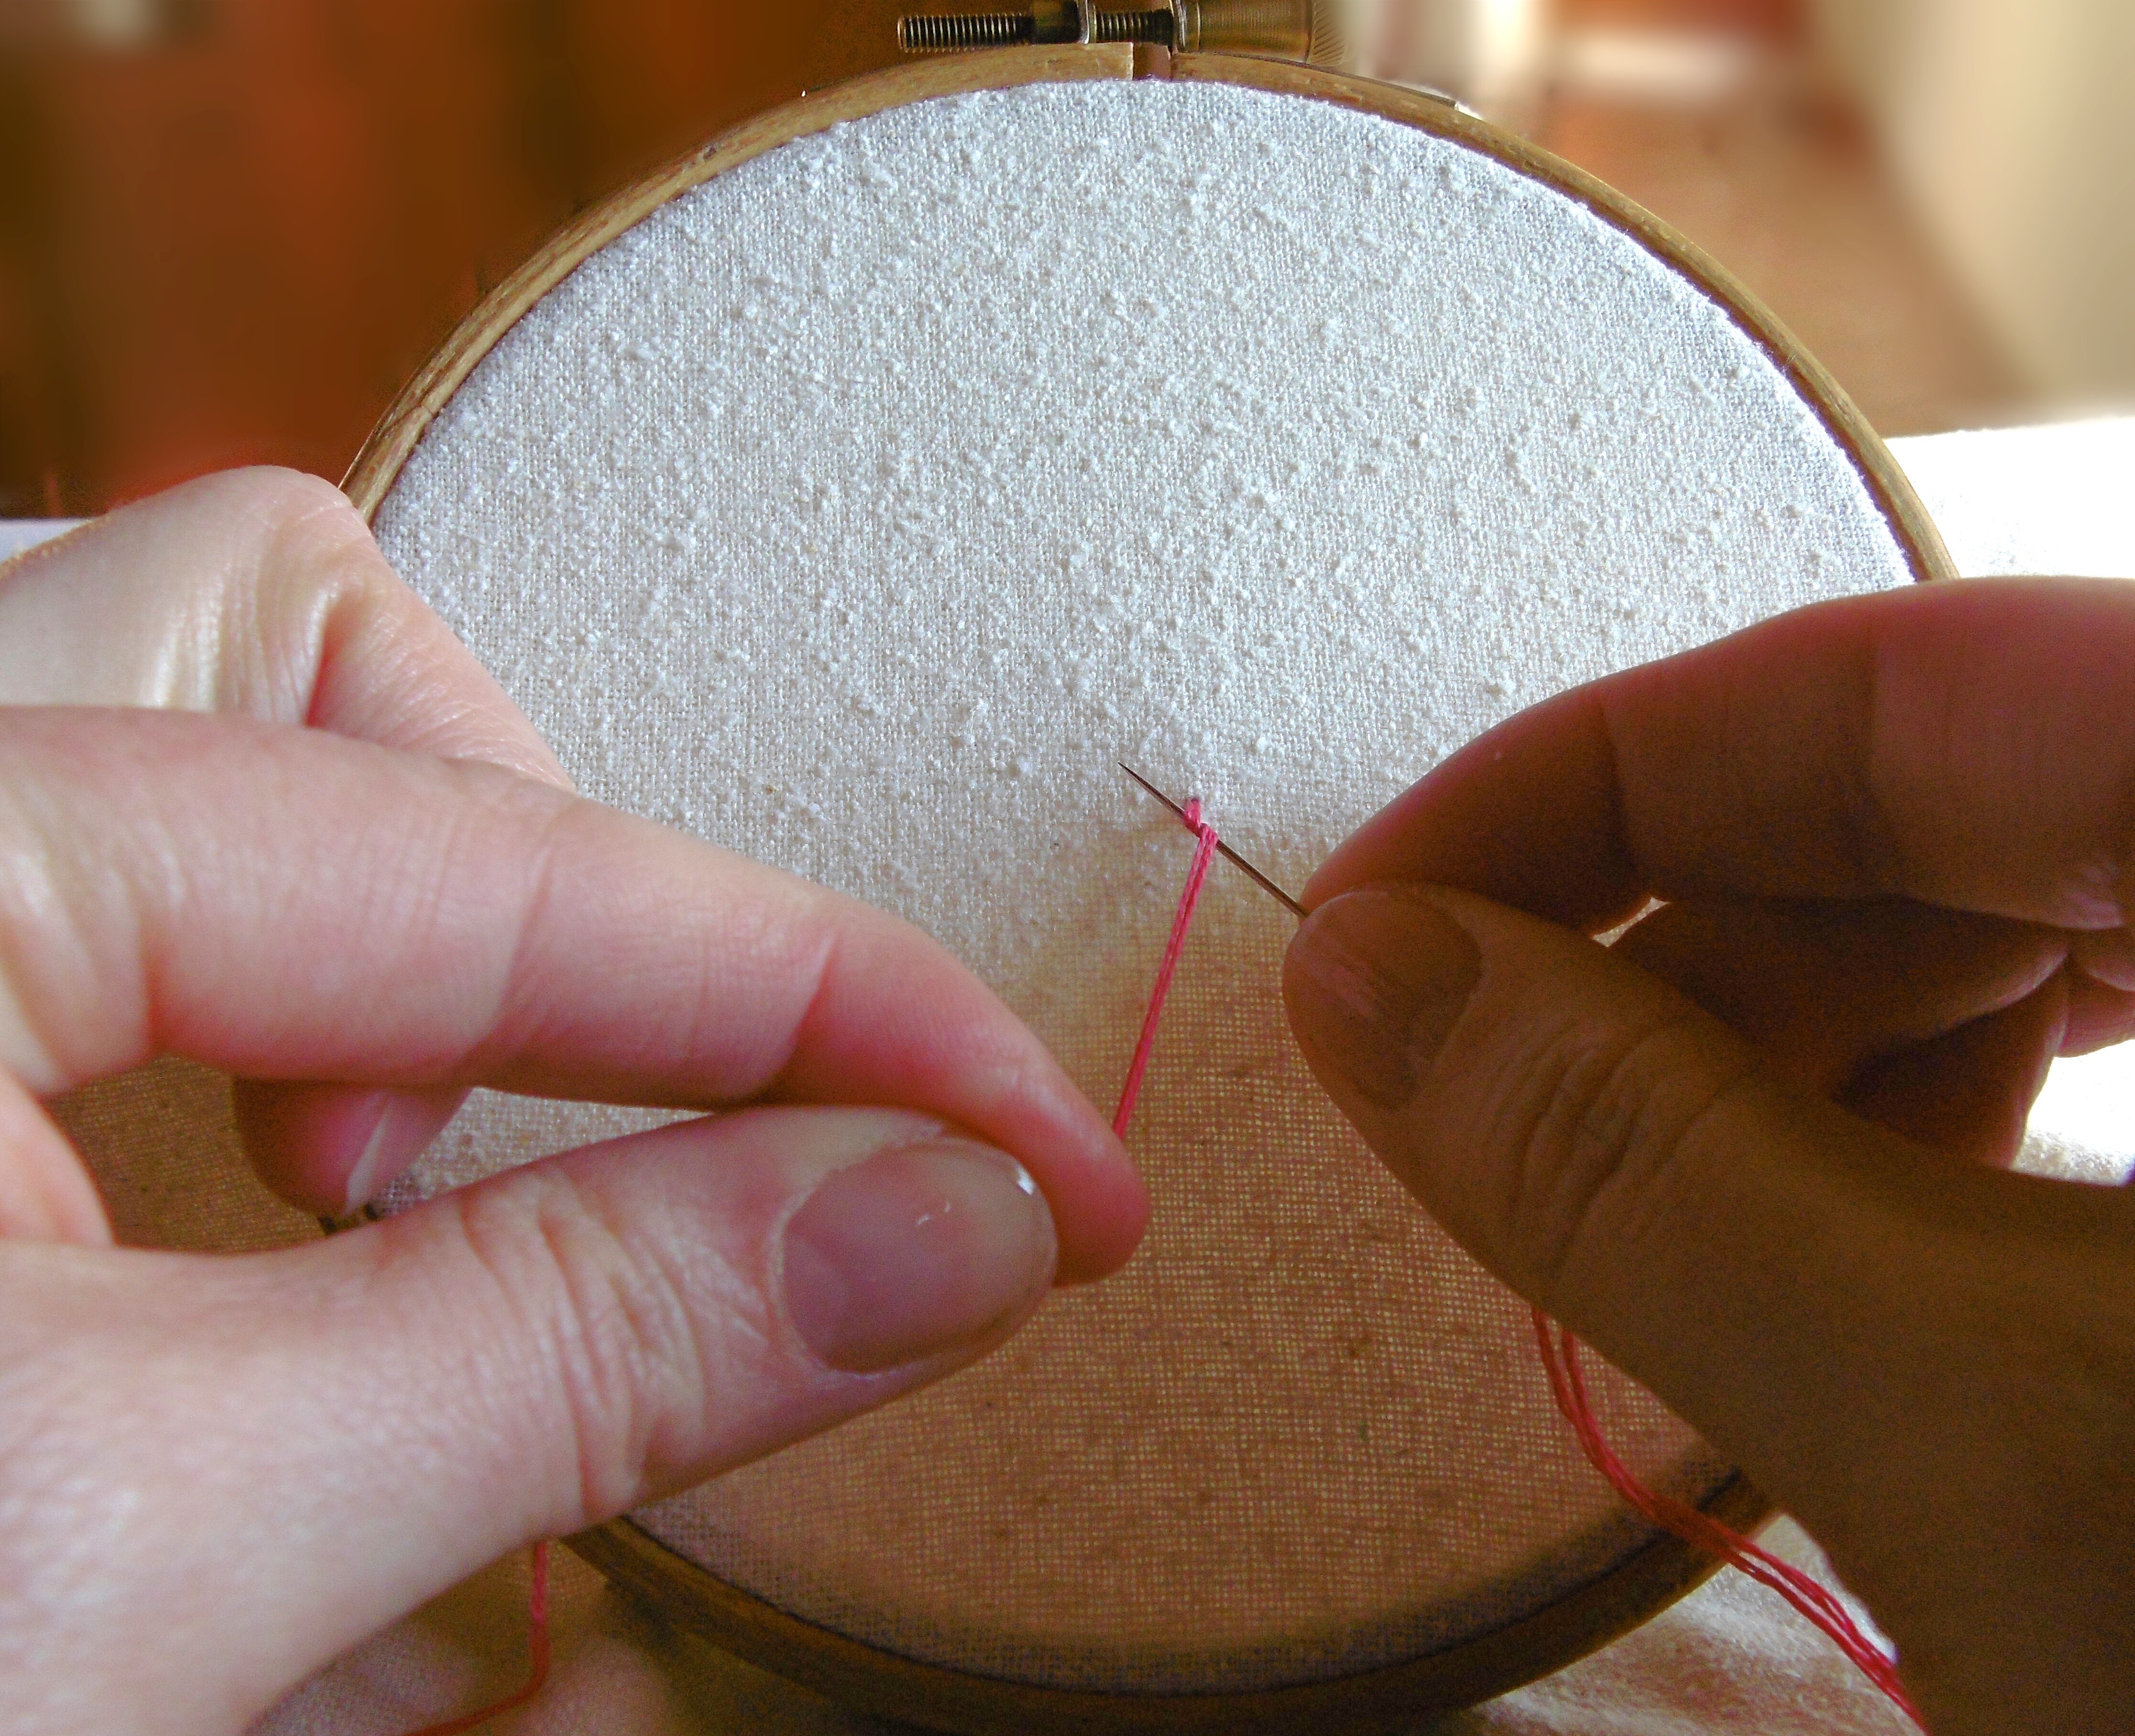
Slide the floss under your needle making sure that the loops you have made stay on the needle by anchoring them with your index finger. Hold down the floss with your thumb, as in the picture above.
Keeping your index finger on the loops, slide the needle back with your thumb and third finger until the loops are very near the point.
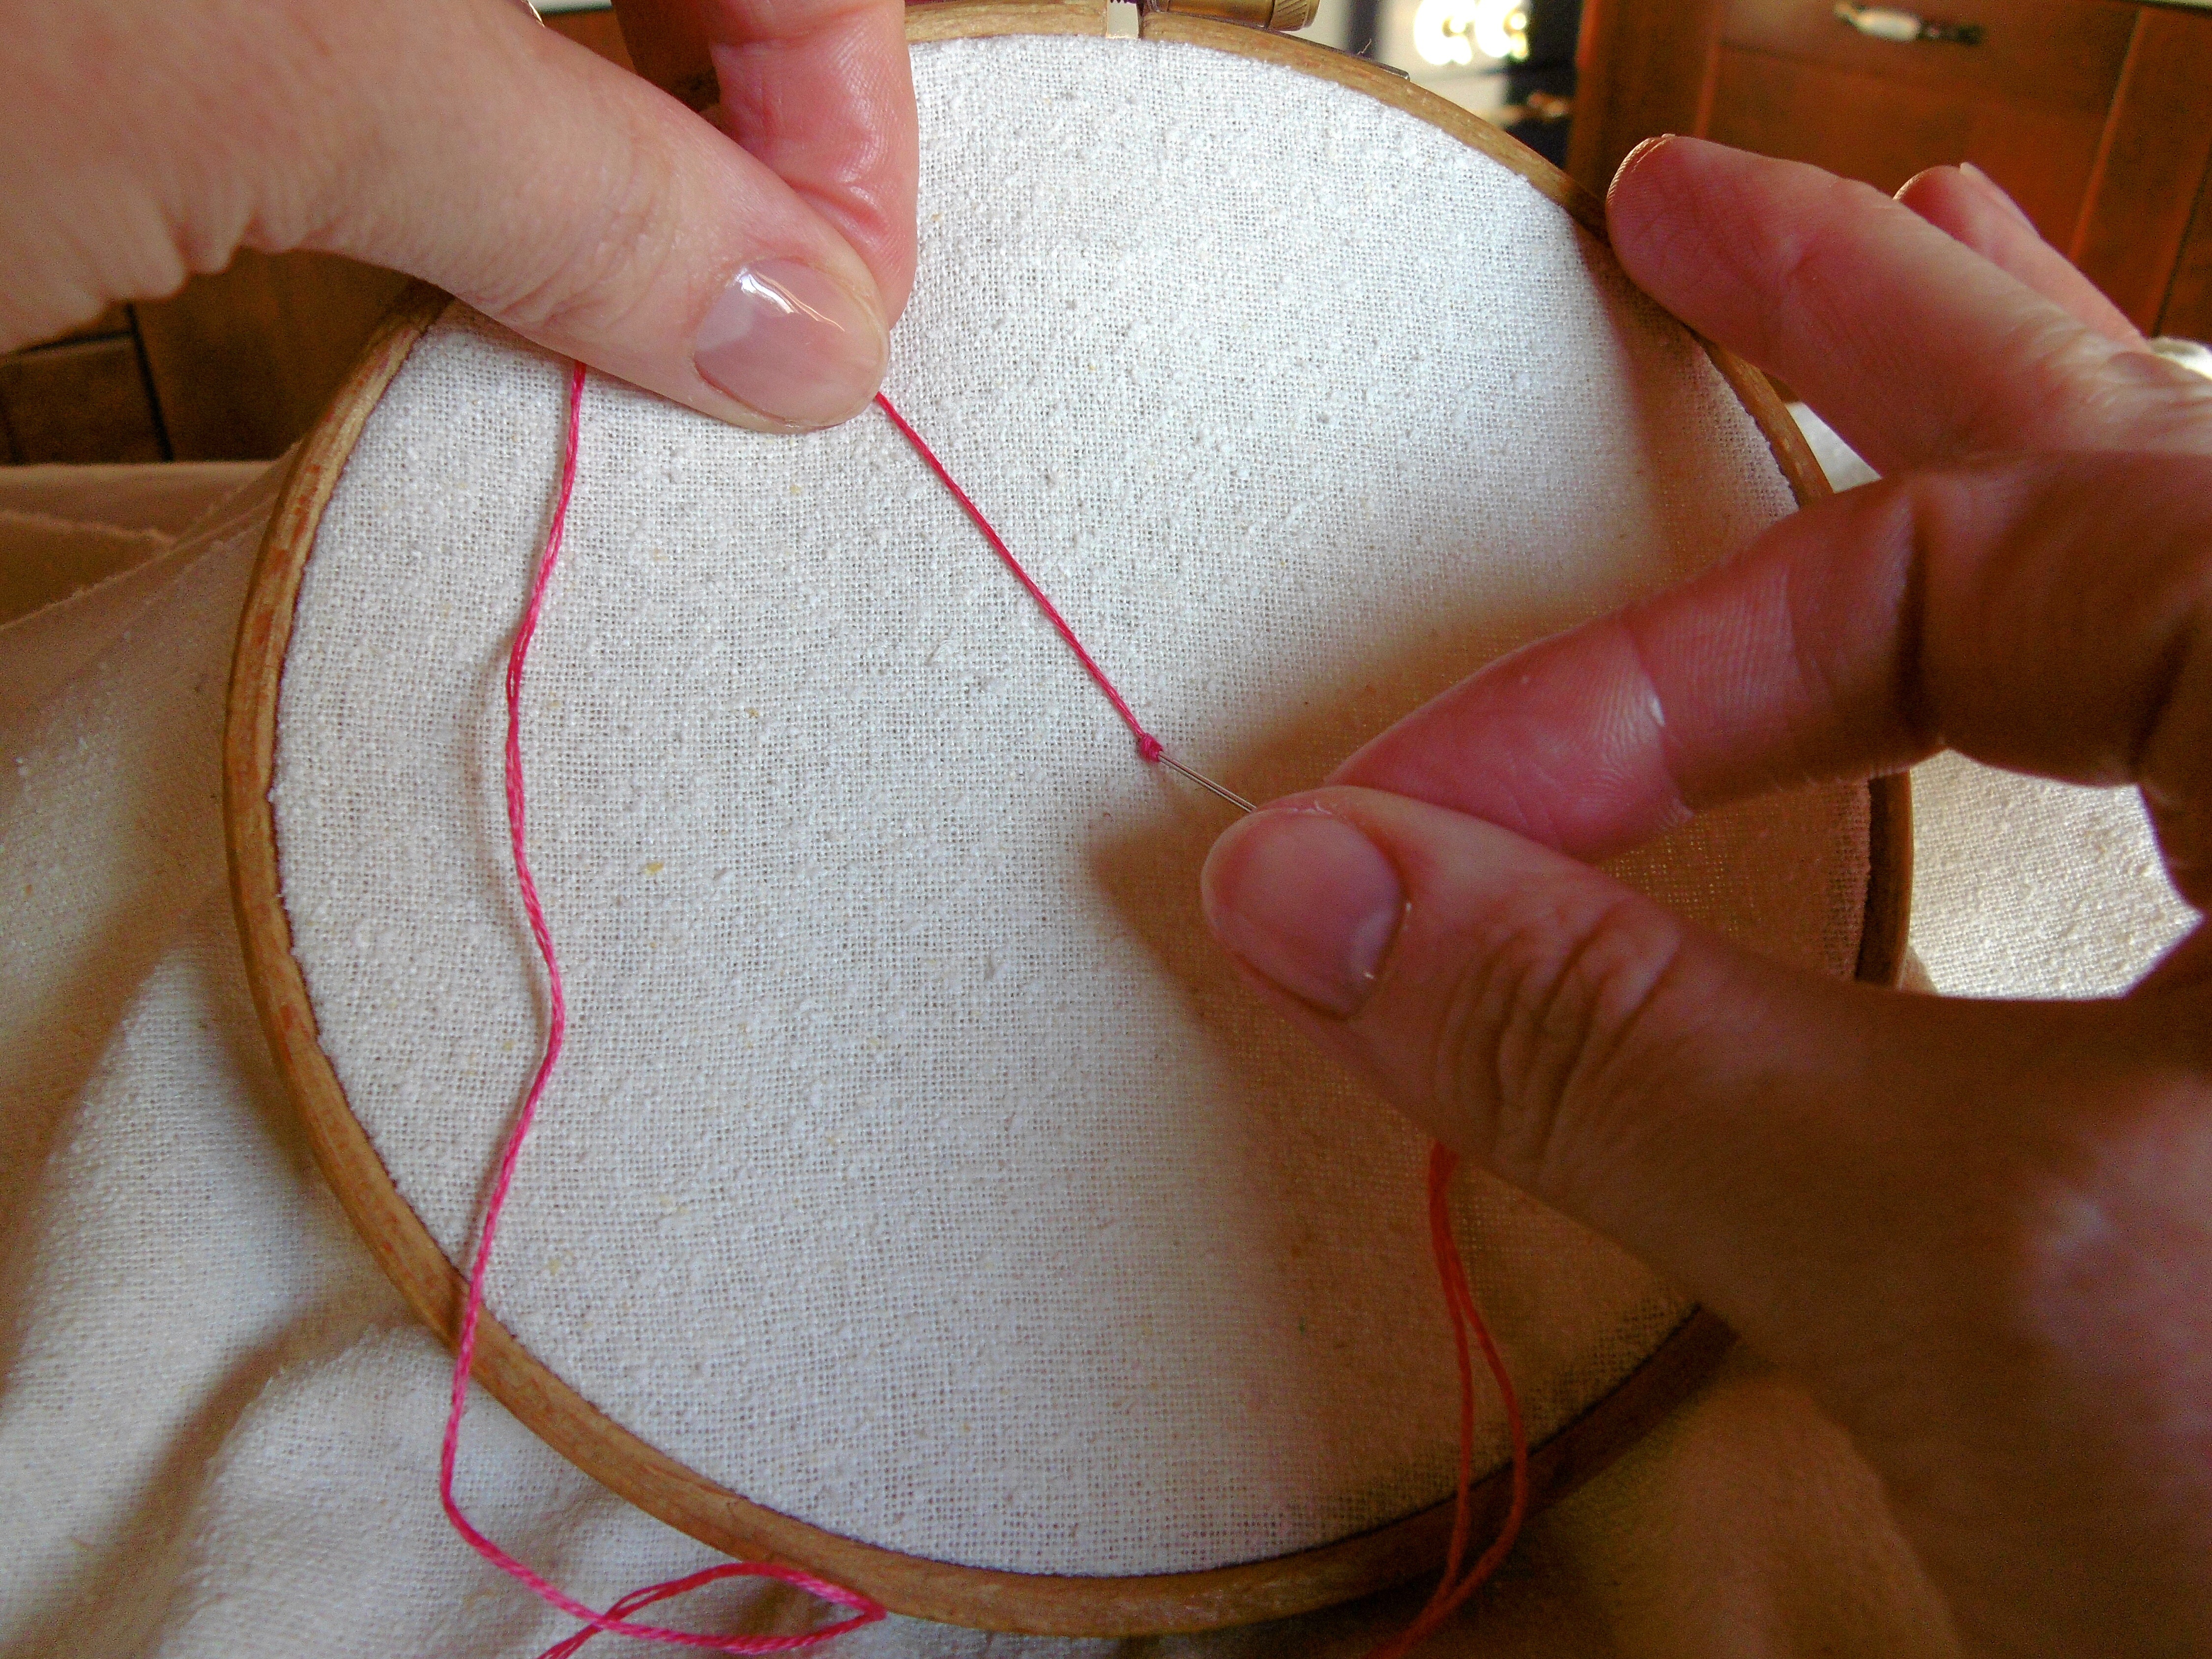
Push the point of the needle into the fabric close to where the thread came out but not exactly the same spot. Make sure the point of the needle stays to the left of the floss you slid under the needle after making the loops.
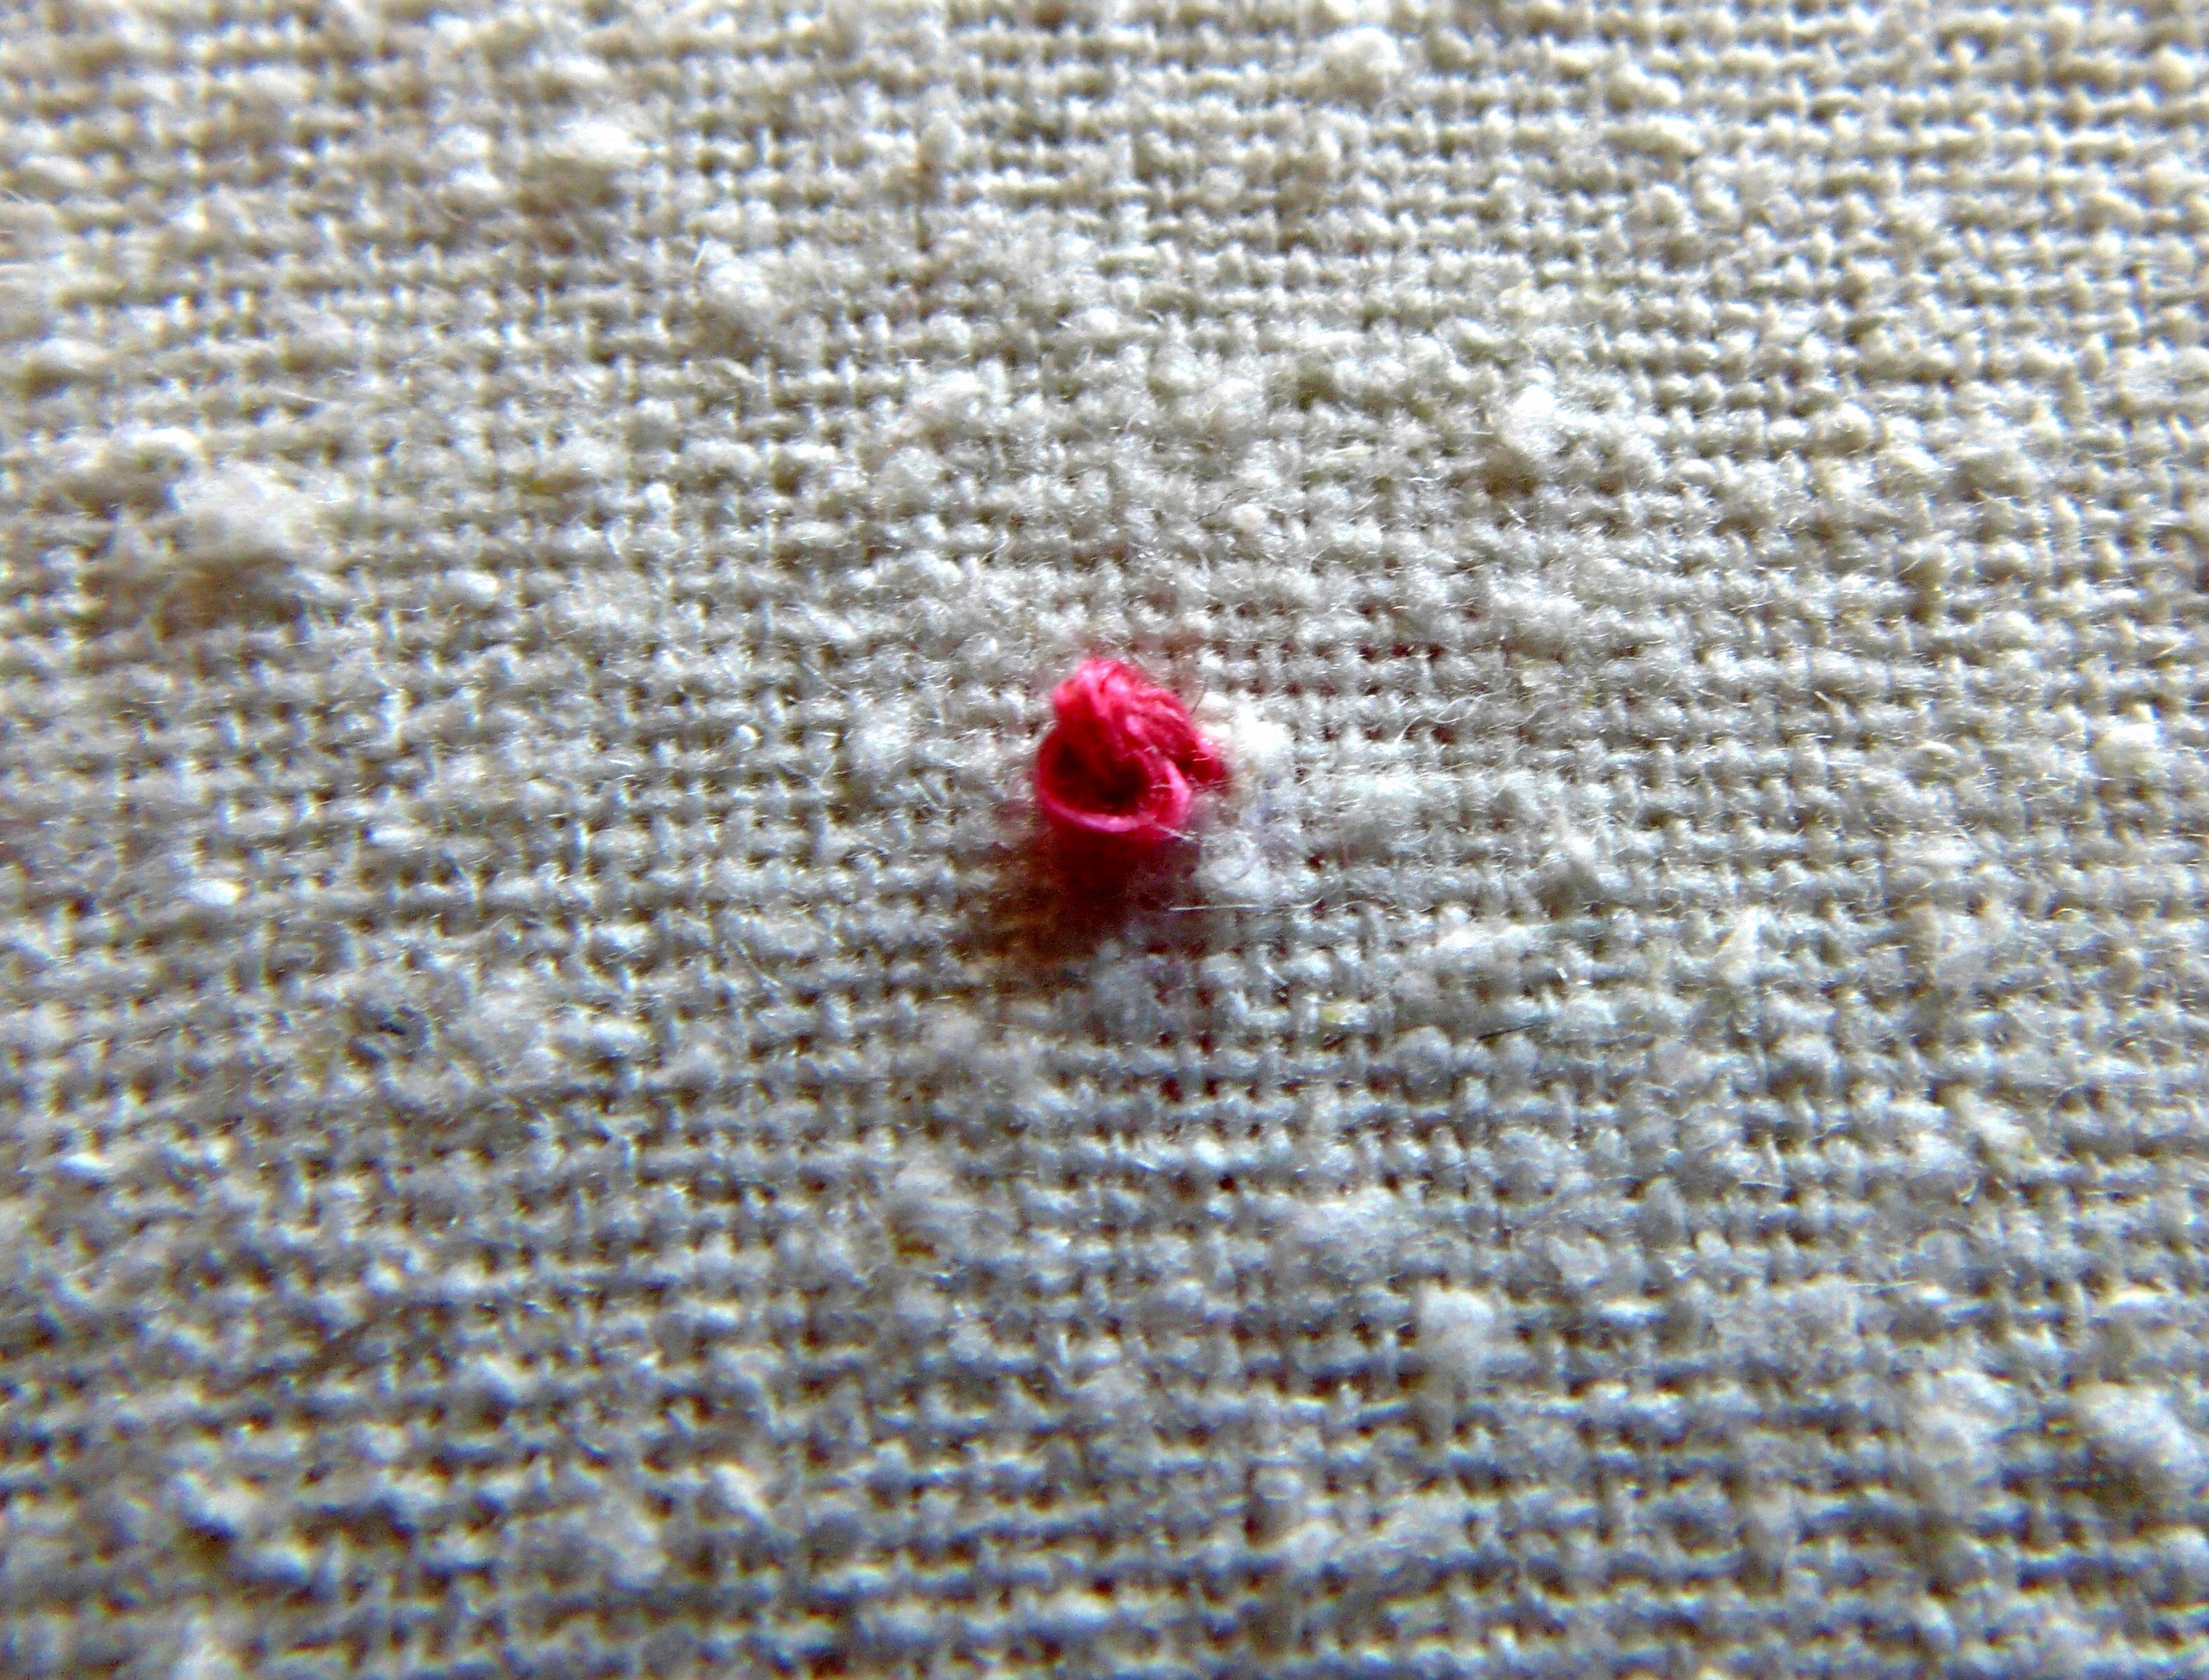
Gently pull the floss through and you should be left with a knot that looks like this.
French Knots are such a fantastic filler stitch and can add texture to an embroidery. You need to use both hands and this method does require a bit of practice. I have found that working with a small hoop really helps with managing it all. In fact, my “negative” monograms which are mounted in 4″ hoops have been perfect for getting some practice in.
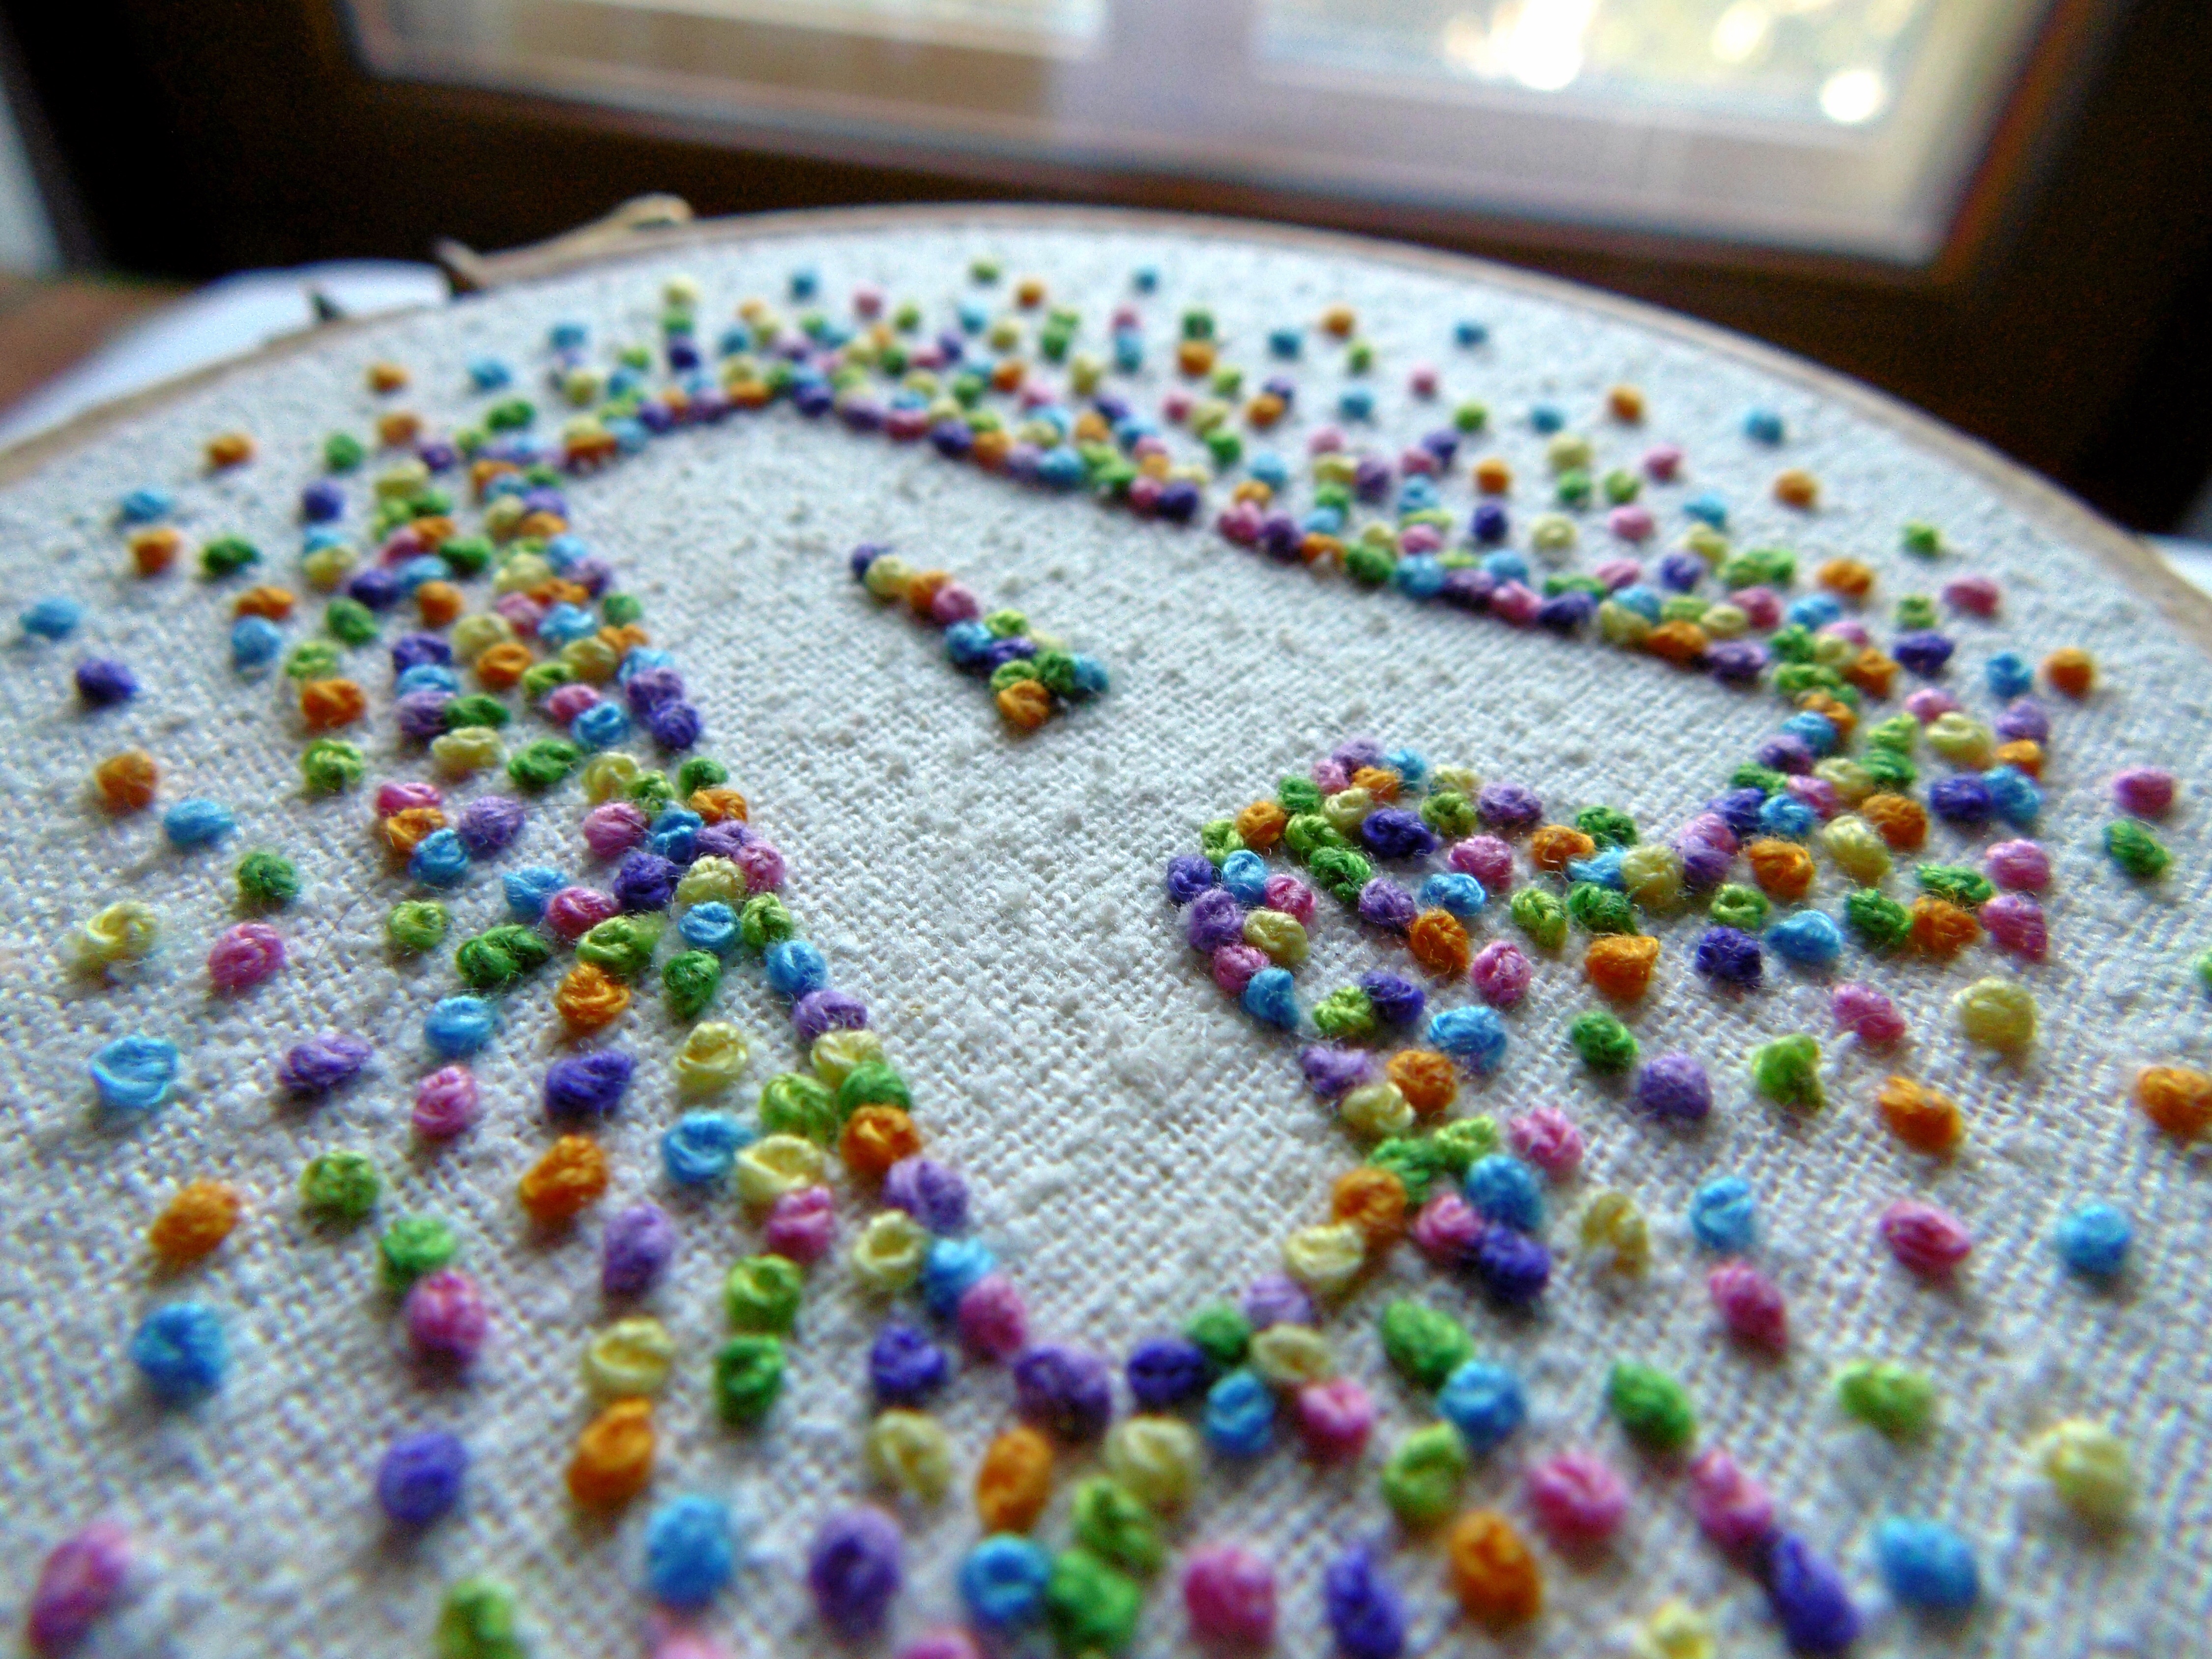
I will try and share how I made these soon!

Your work with French knots are so effective and look amazing 🙂
LikeLiked by 1 person
Thank you – you’re so kind 😊
LikeLiked by 1 person
Thanks for the tutorial, I am itching to try this now!! My french knots have always been pretty crap :p
LikeLiked by 1 person
Aw thanks! I was a bit nervous about posting it! Do let me know how you get on. Xx
LikeLike
wow, I’d never have thought of doing a design in just French knots! amazing
LikeLiked by 1 person
Thank you so much 😊
LikeLike