
Well, alright, that title may be a little over ambitious! But this little project, made entirely of French Knots is quick and fun (honest!). It only requires a small quantity of fabric and you can use up left over floss so it is thrifty too. What’s not to love?!
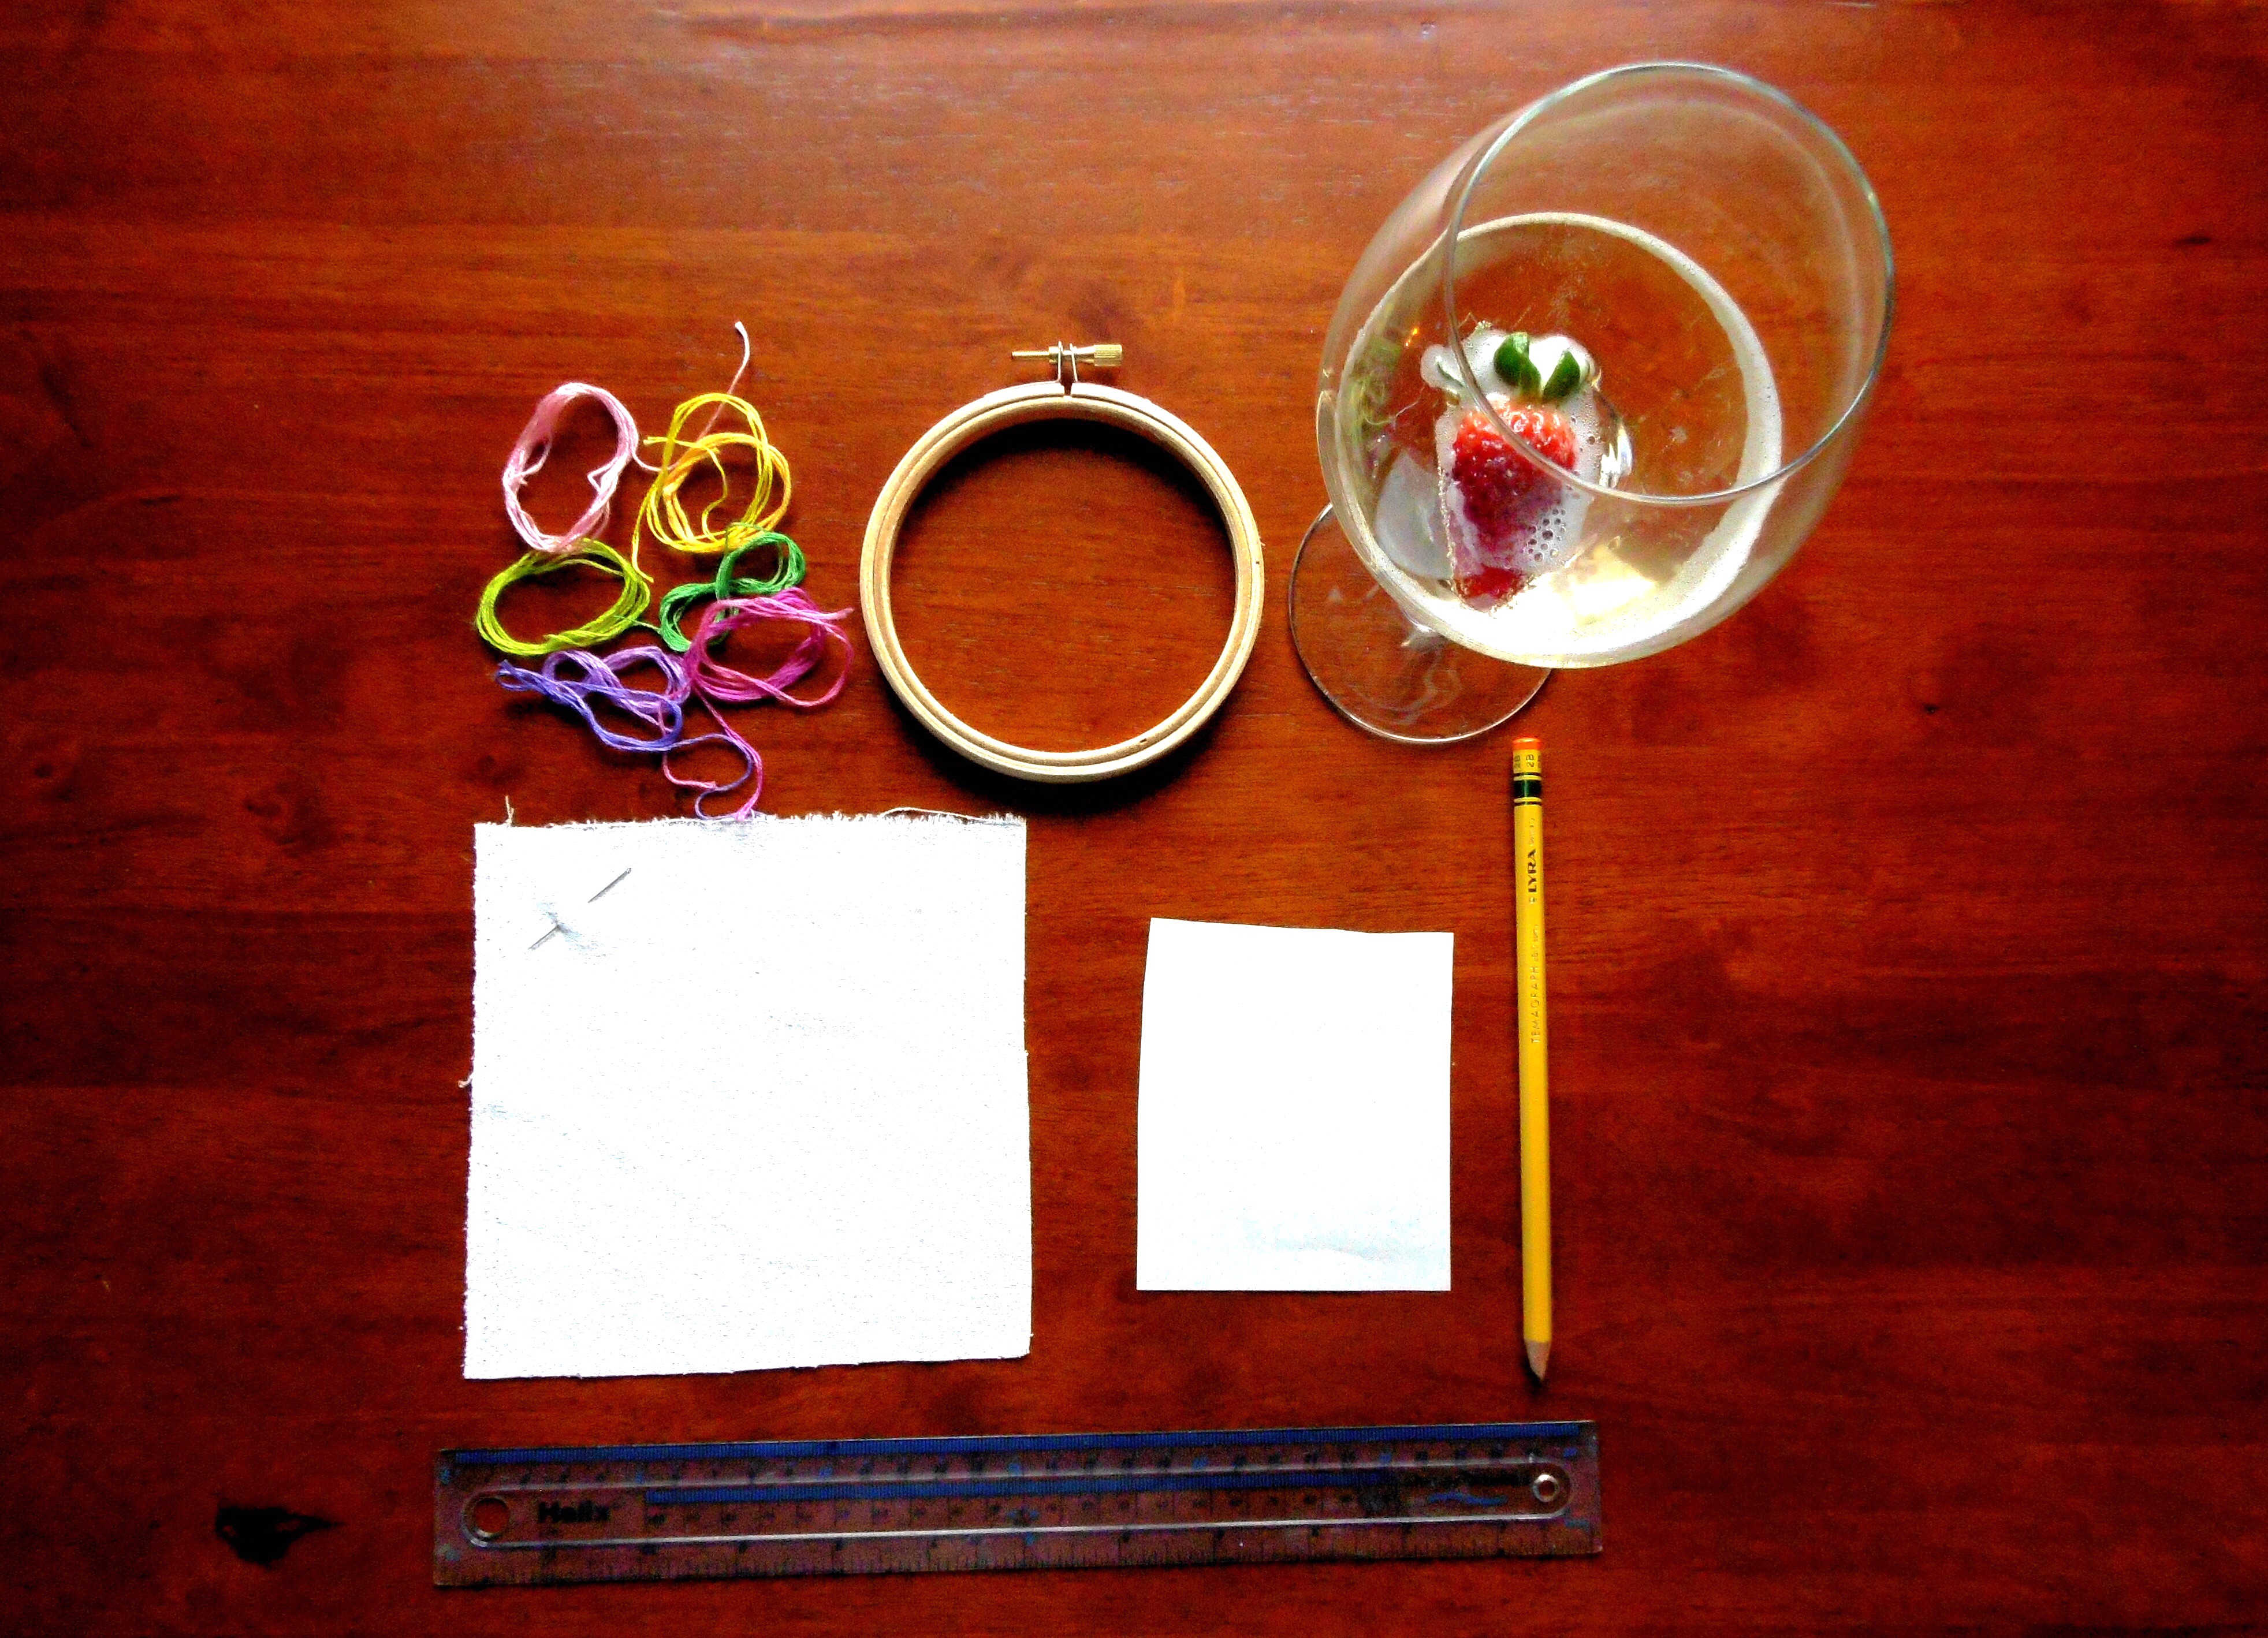
So here are your essential tools for this project. Quite clearly, one of these things is entirely optional…… Yes, you’ve guessed right: placing a fresh strawberry in your glass of Prosecco is entirely a matter of personal taste! 😉. Interesting thing, in the UK, we usually serve Prosecco in champagne glasses but here in Italy, they serve it in large glasses. Apparently, it gives a better flavour. I can’t say I have noticed a difference but I have always found Prosecco delicious! Anyway, I digress. This project fits into a 10 cm (4″) hoop. You only require enough fabric to fit into the hoop with a couple of centimetres excess. I just used colourful scraps of embroidery floss that I had lying around in my embroidery supplies box. I have also completed a similar project in varying shades of yellow. You just need to be sure that there is a good contrast between the floss and the fabric or your negative space won’t stand out sufficiently.

The first thing you have to do is draft your negative shape. I have chosen to do a monogram but you could use any shape really. I would recommend that you keep the outline relatively simple to maximise the impact. If you do want to make a monogram, you could just pick a font on your computer, enlarge the size and cut out the shape once you have printed it. Whichever way you choose, you just need to keep in mind the size of the monogram in relation to the hoop you are using. It needs to be big enough to have impact but small enough to ensure that it is surrounded by plenty of French Knots! For this 10cm hoop, I made my monogram 5cm by 4cm wide.

Secure the fabric in the hoop and place the paper pattern in the centre. As this is a small pattern, you should be able to hold it in place with one hand as you draw around the template directly onto the fabric. You could use a fabric pen if you have one but don’t go out and buy one specially. You will be stitching all over the lines anyway so they won’t be seen. Drawing around the template means that the pattern on your fabric will be slightly larger than the one you have drafted. This allows you to stitch French Knots directly onto the pencil lines – the knots will naturally sit slightly over the line so the finished shape will be the one you want.

The next thing to do is to mark the centre of the shape. The French Knots will have the appearance of “exploding” from a central point. The knots will be more dense in the centre and gradually disperse towards the outside. I find having clearly in mind the central point helps to make sure I have dispersed the stitches properly. If the central point is going to be covered in knots, then you can use your pencil……
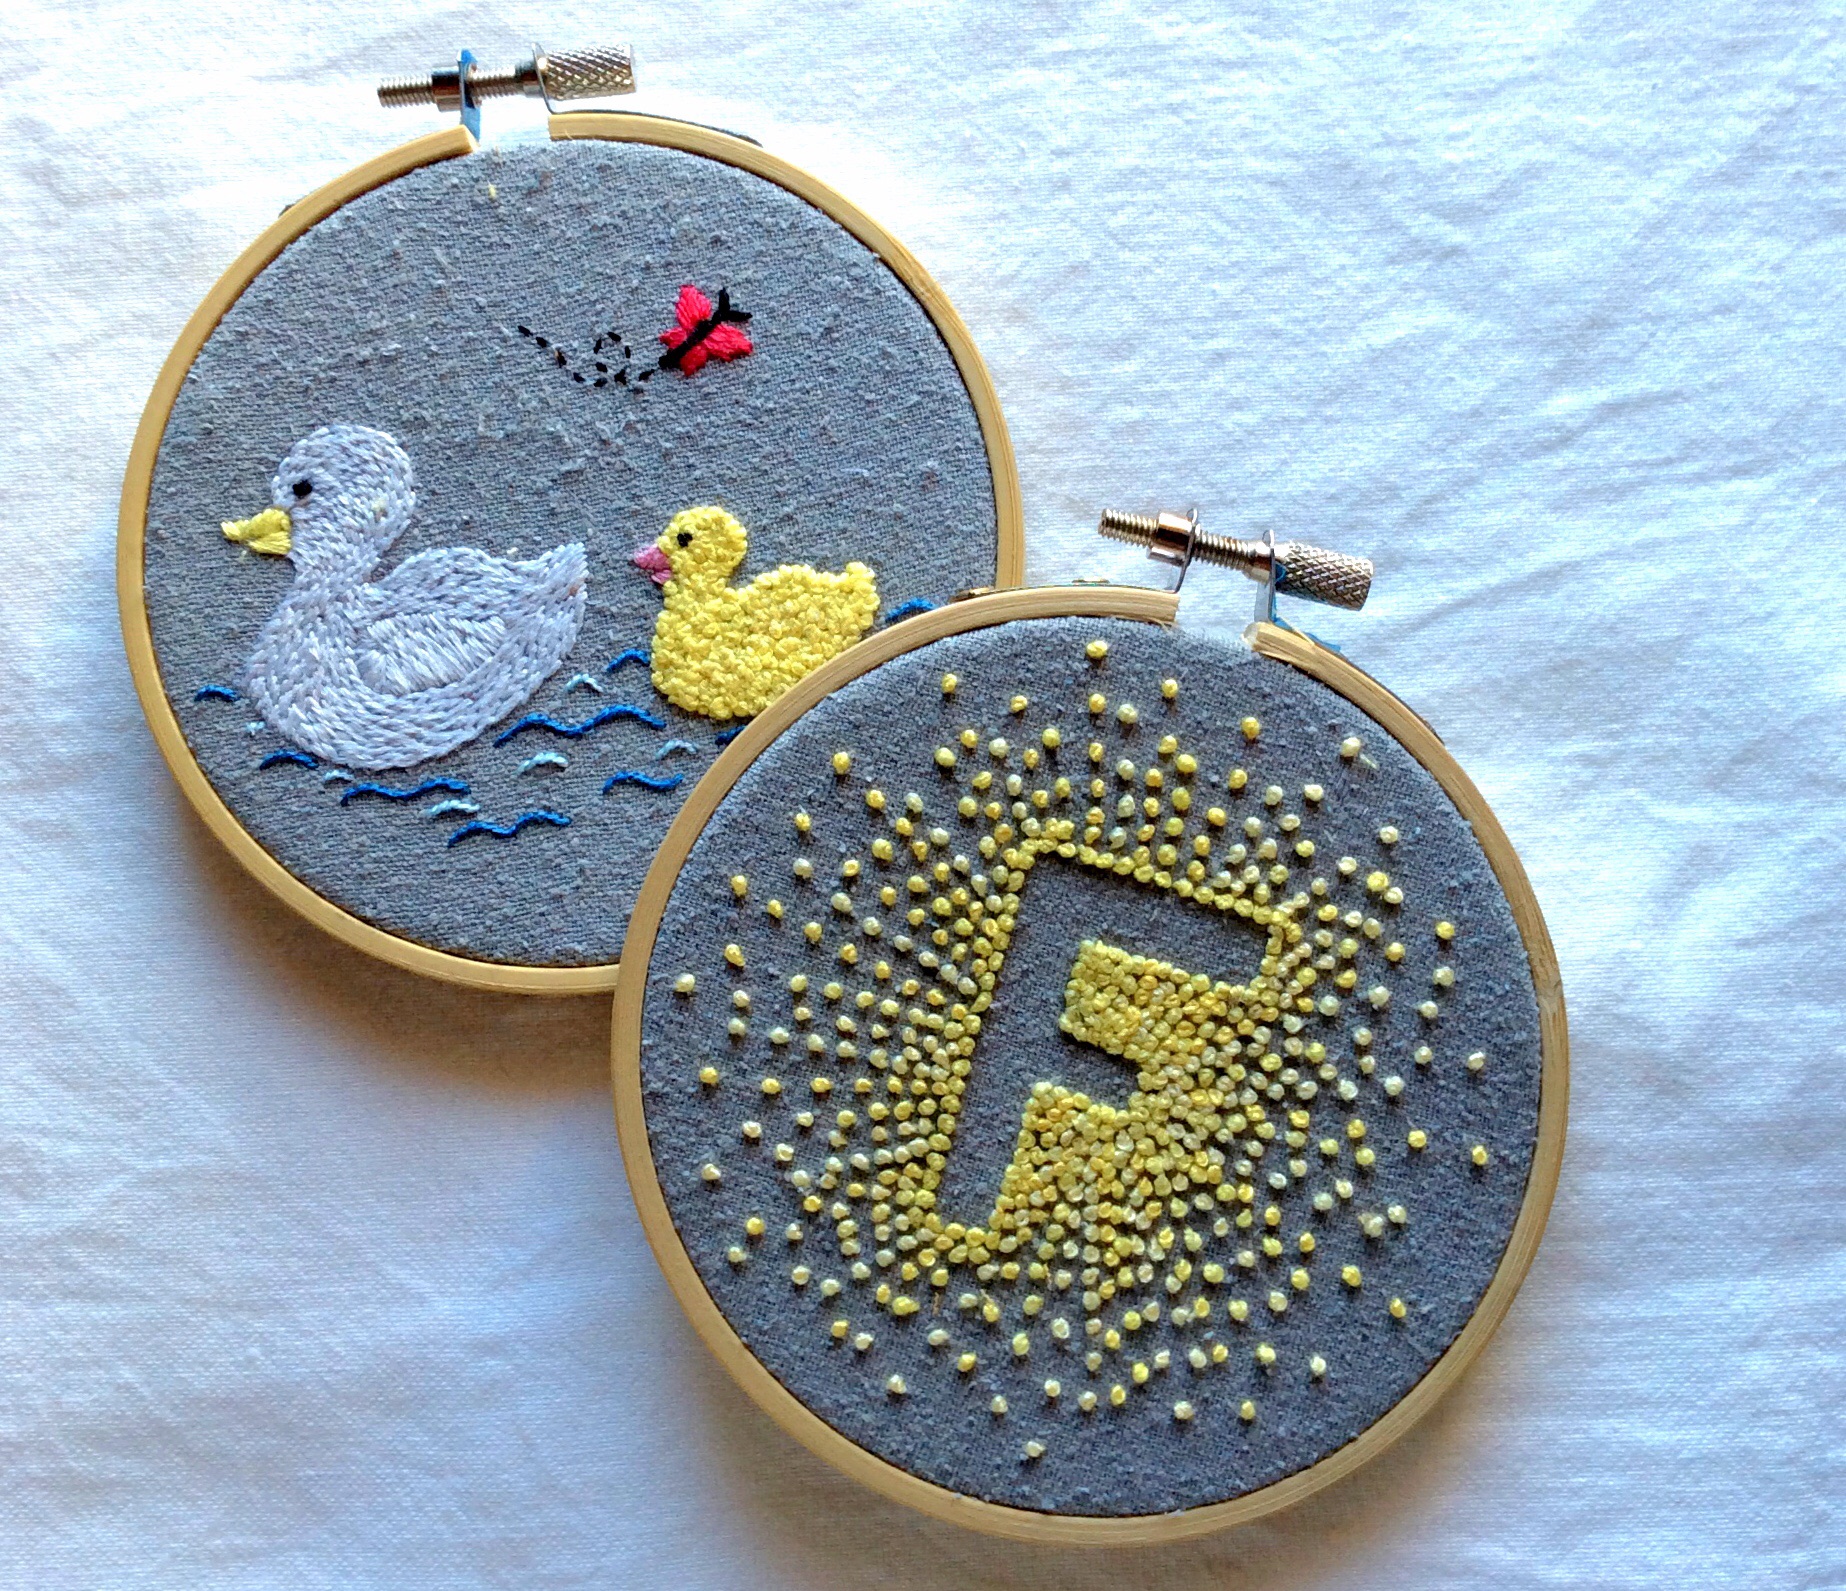
If, however, the centre of the the letter falls into the part that will be the negative space (like in the letter F above)…..
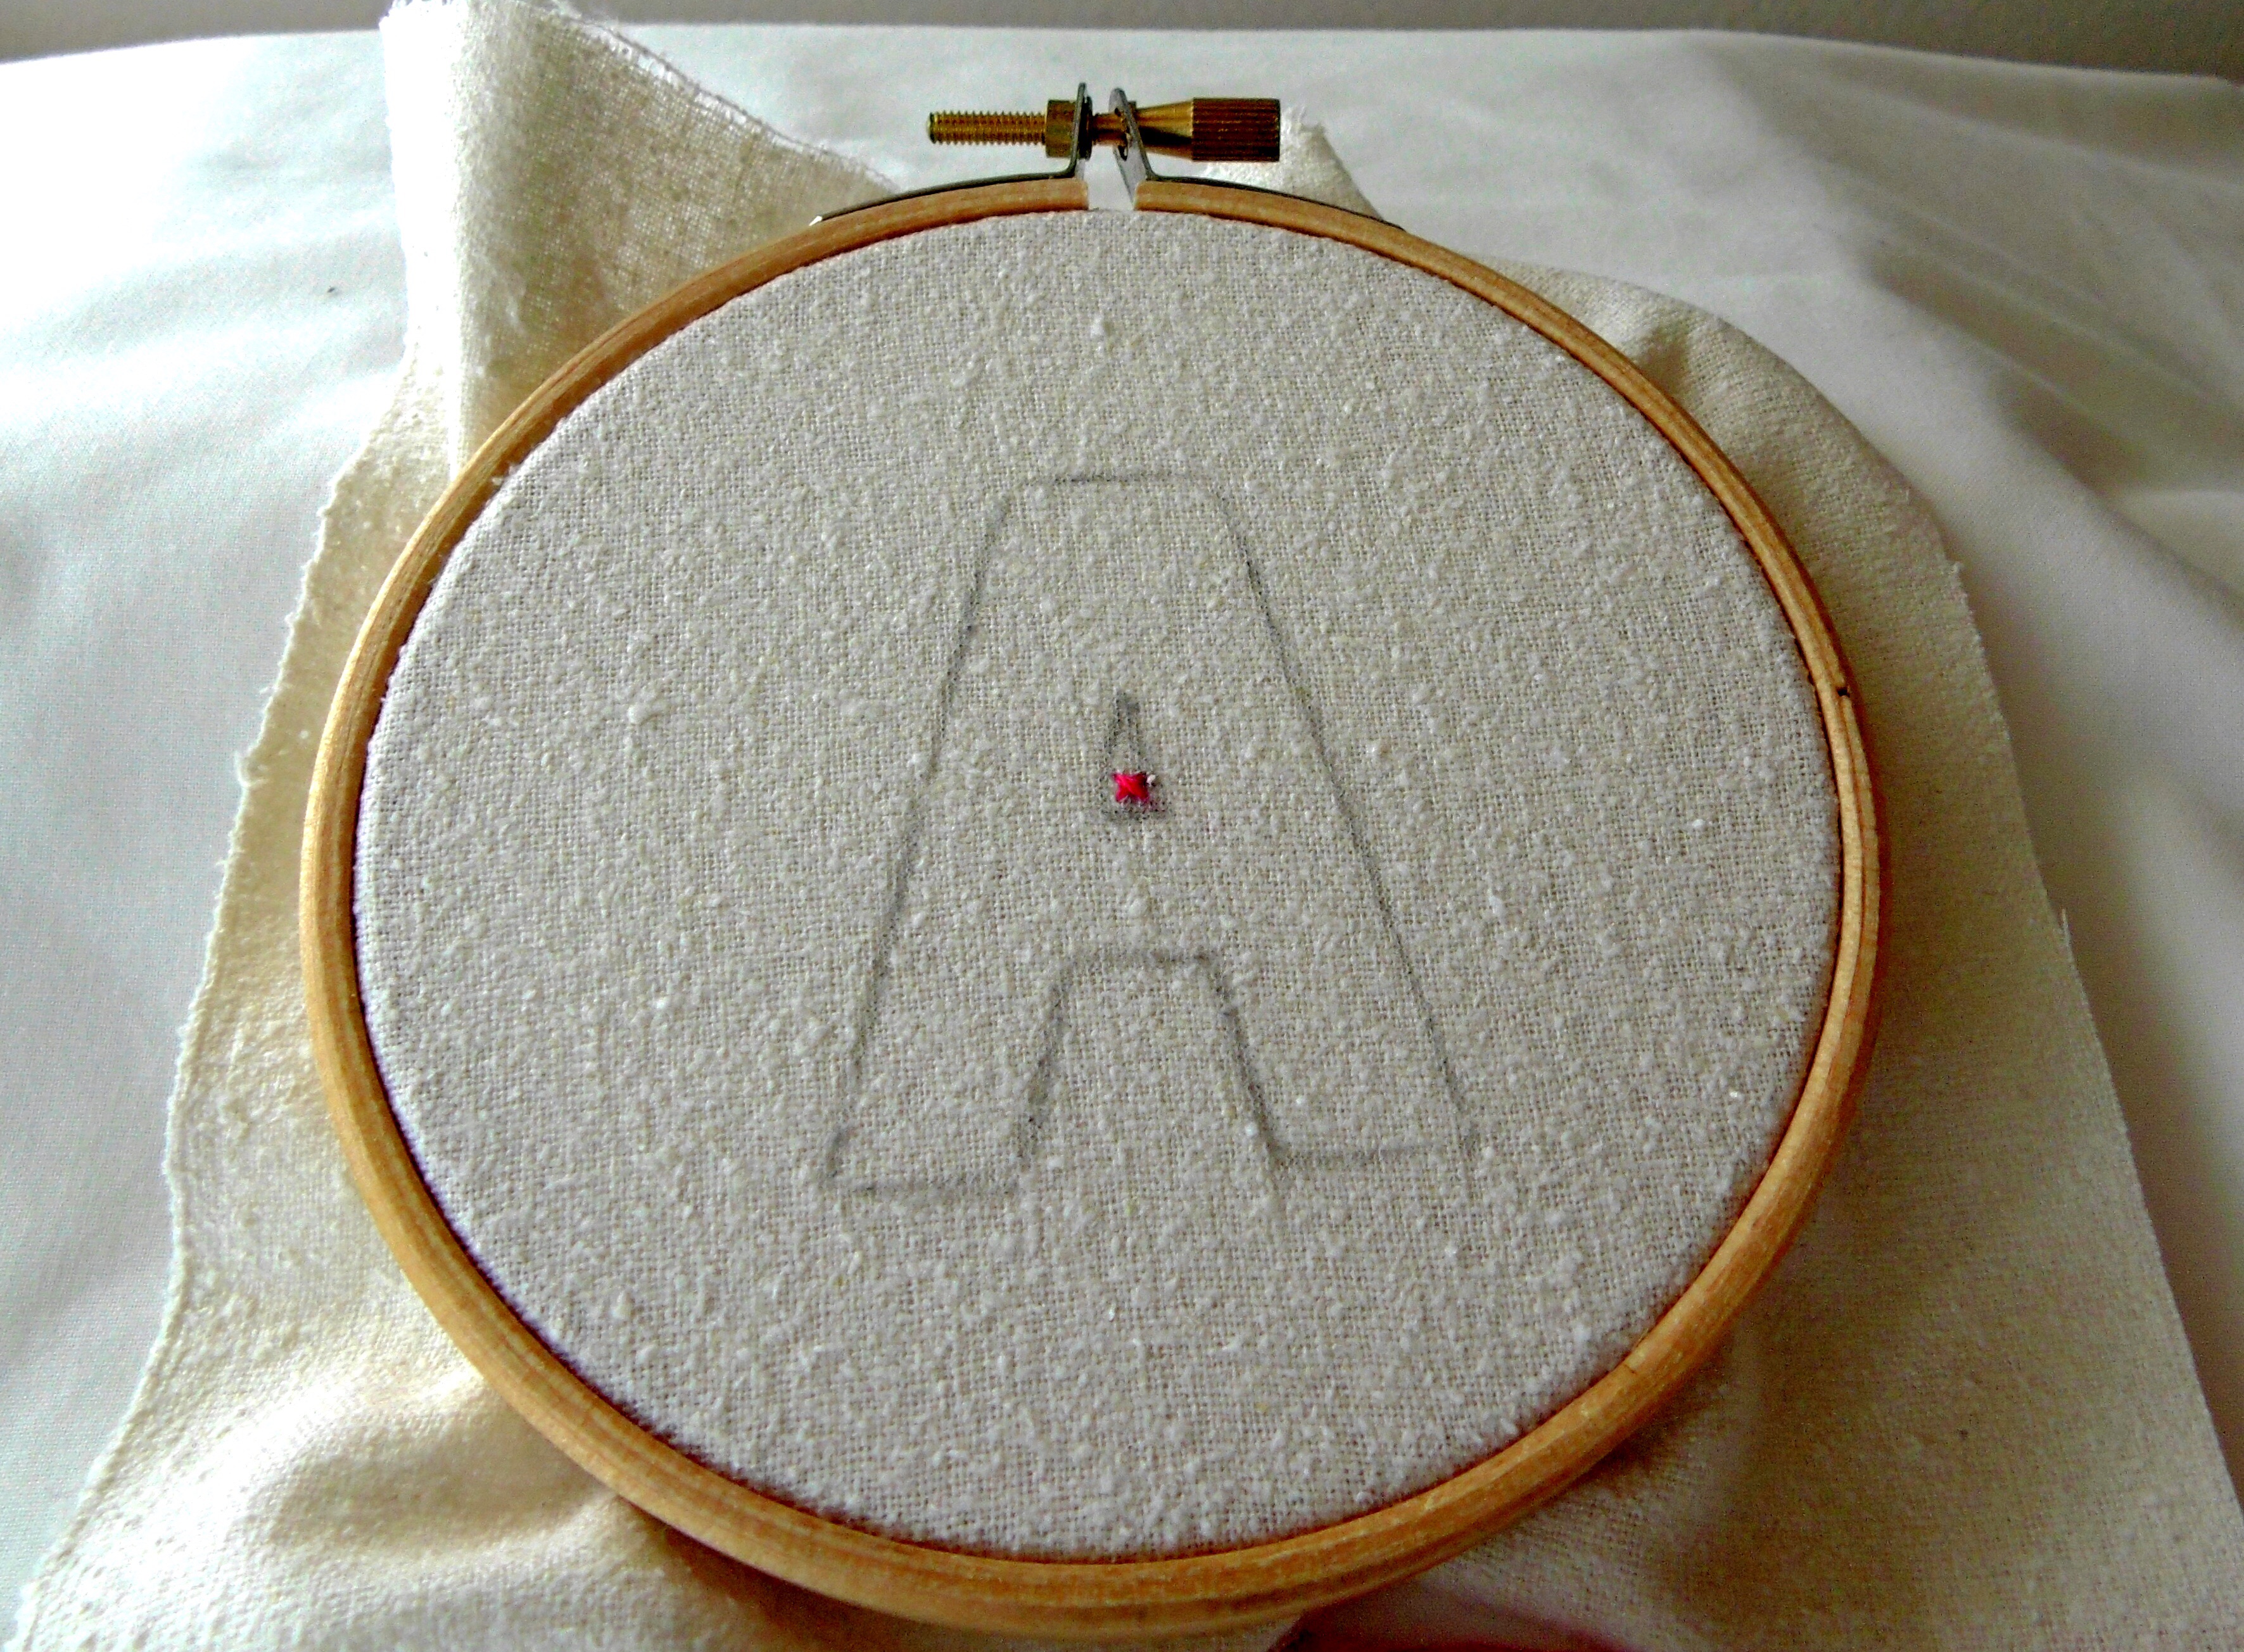
…you may find it useful to mark the centre with a cross stitch that can be removed once you have got started. The centre of this project will be covered in knots but I put a stitch in just for the sake of these photos.
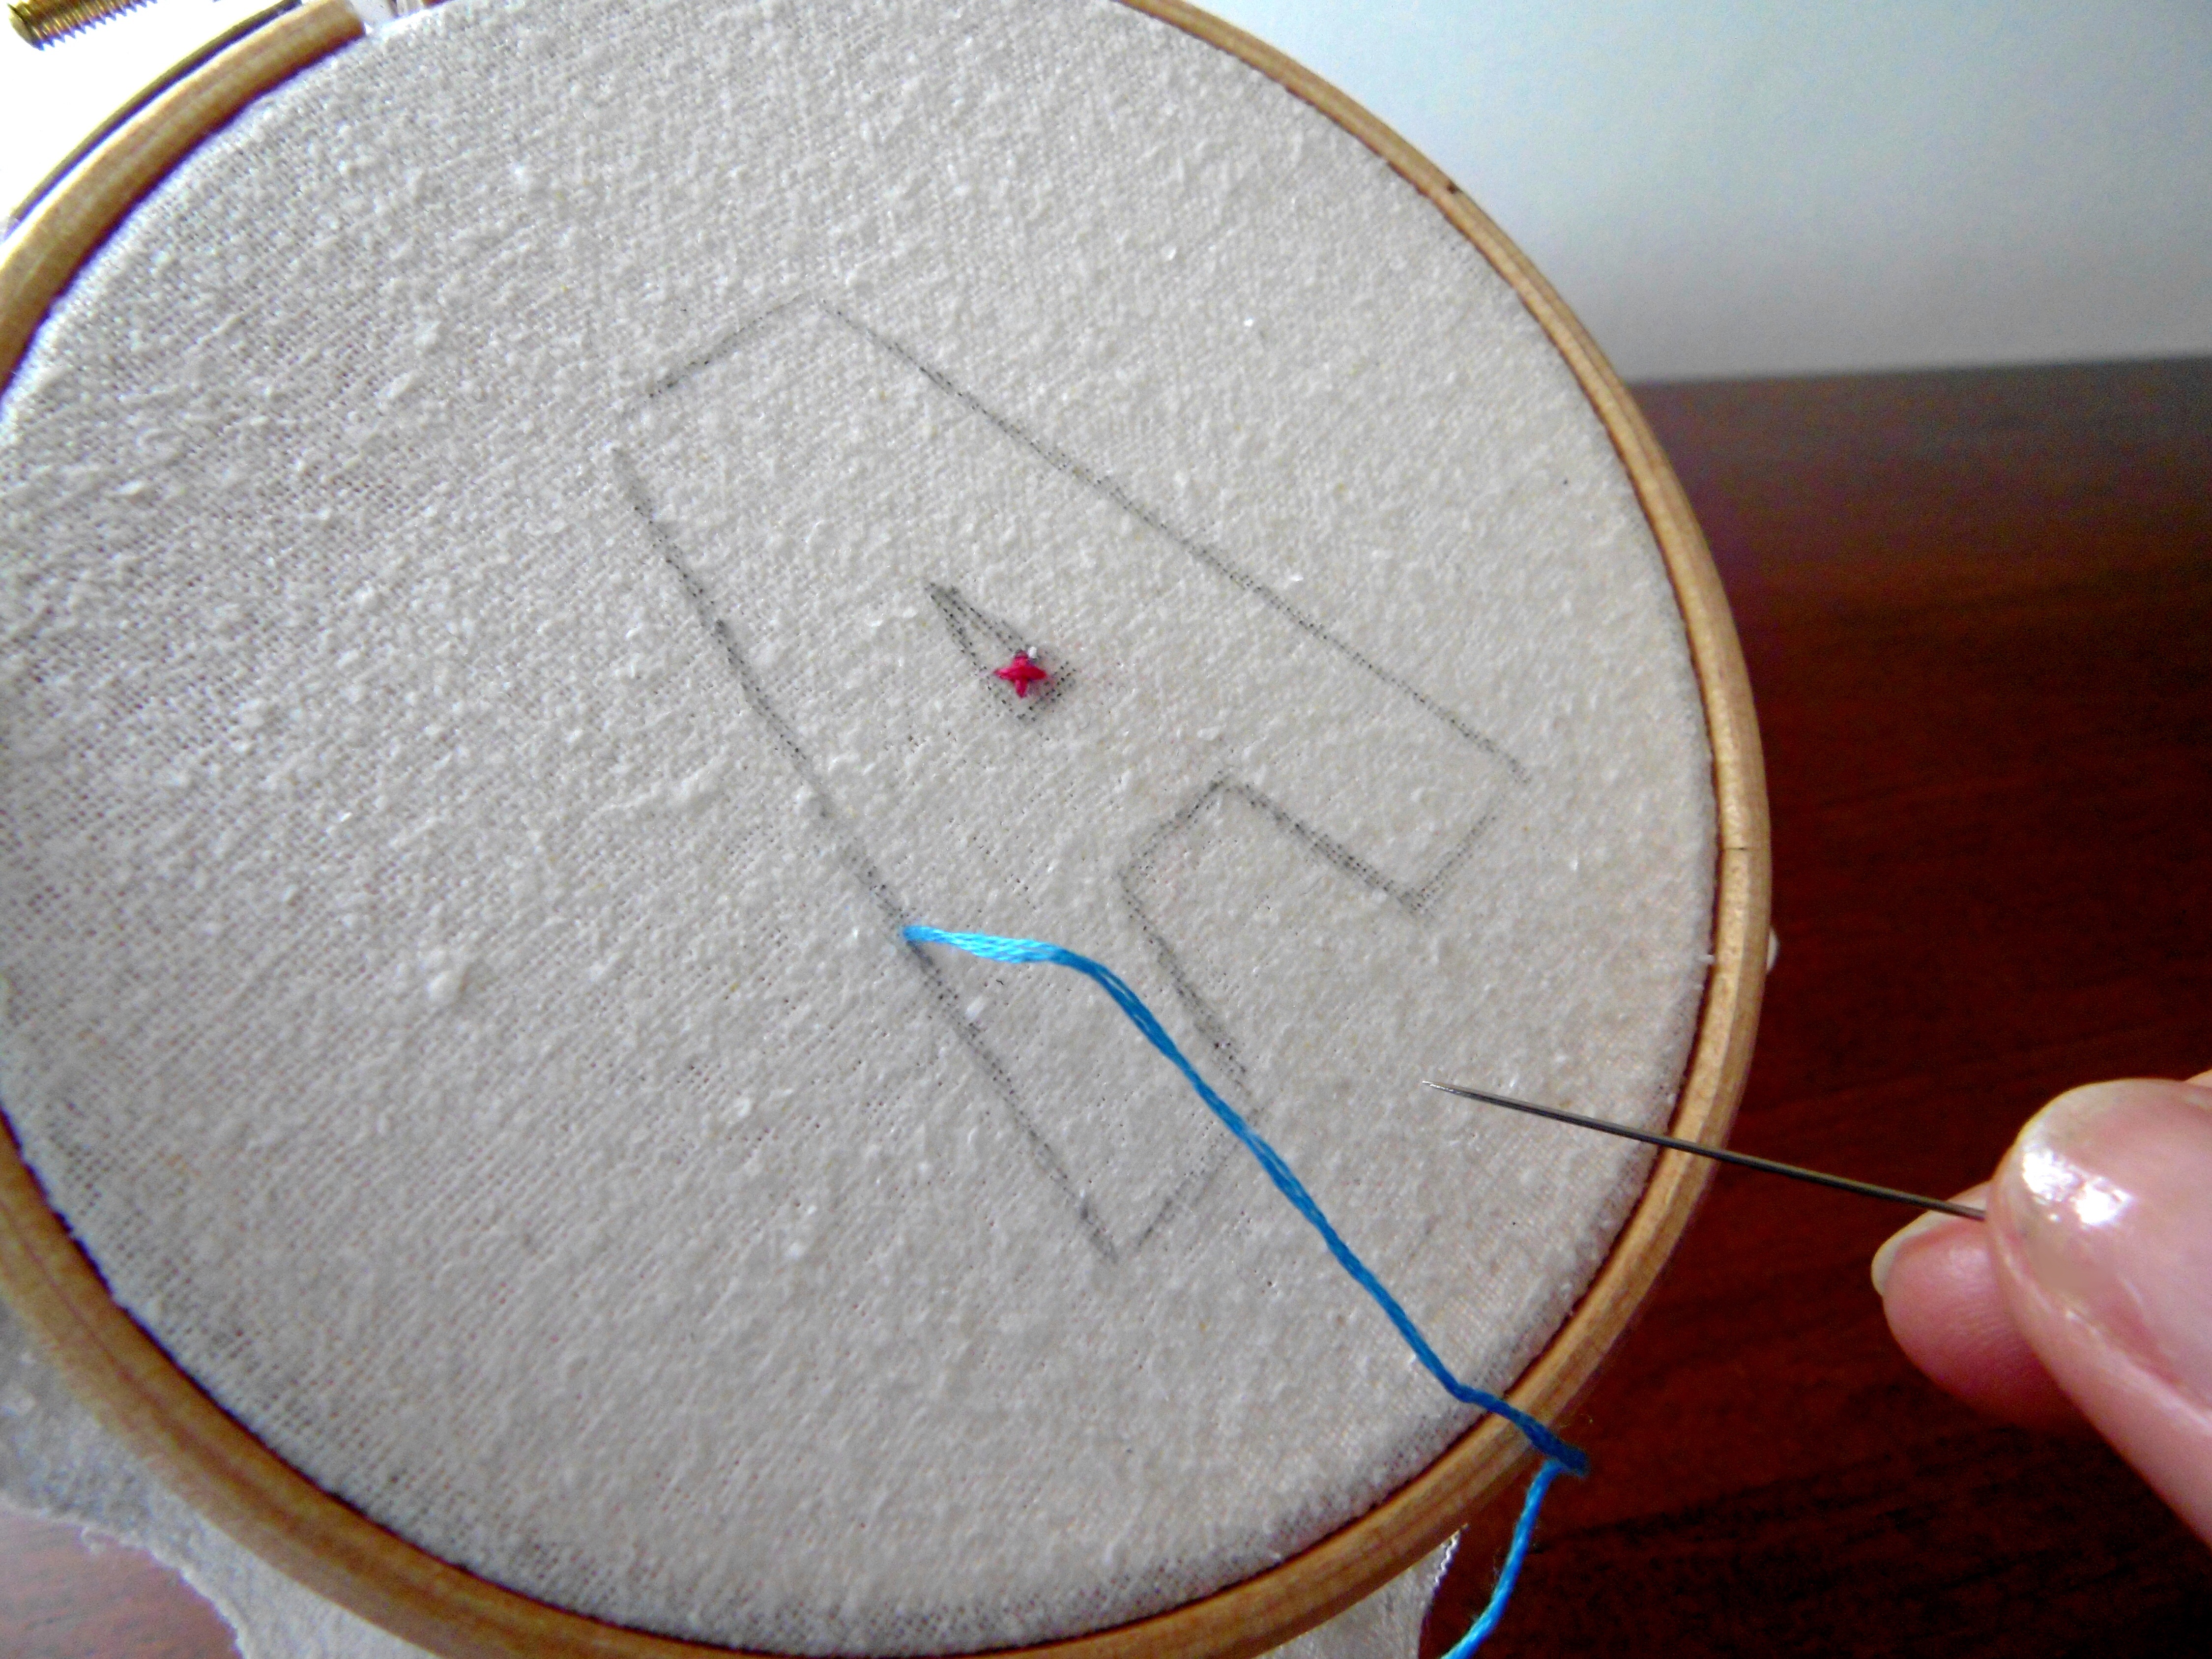
Now you can start stitching! I posted a French Knot tutorial last week which you may (or may not) find useful. Don’t forget a leisurely sip of your Prosecco from time to time 😉. Start by working your first colour along the outline at fairly random intervals. We are not going for uniform or even just now!

Once you have gone right the way round the outside, it should look something like this. Take a second colour and work in the same way. Having done this, you will be ready to start working your colours on the edge of the shape and out towards the edge of the hoop.
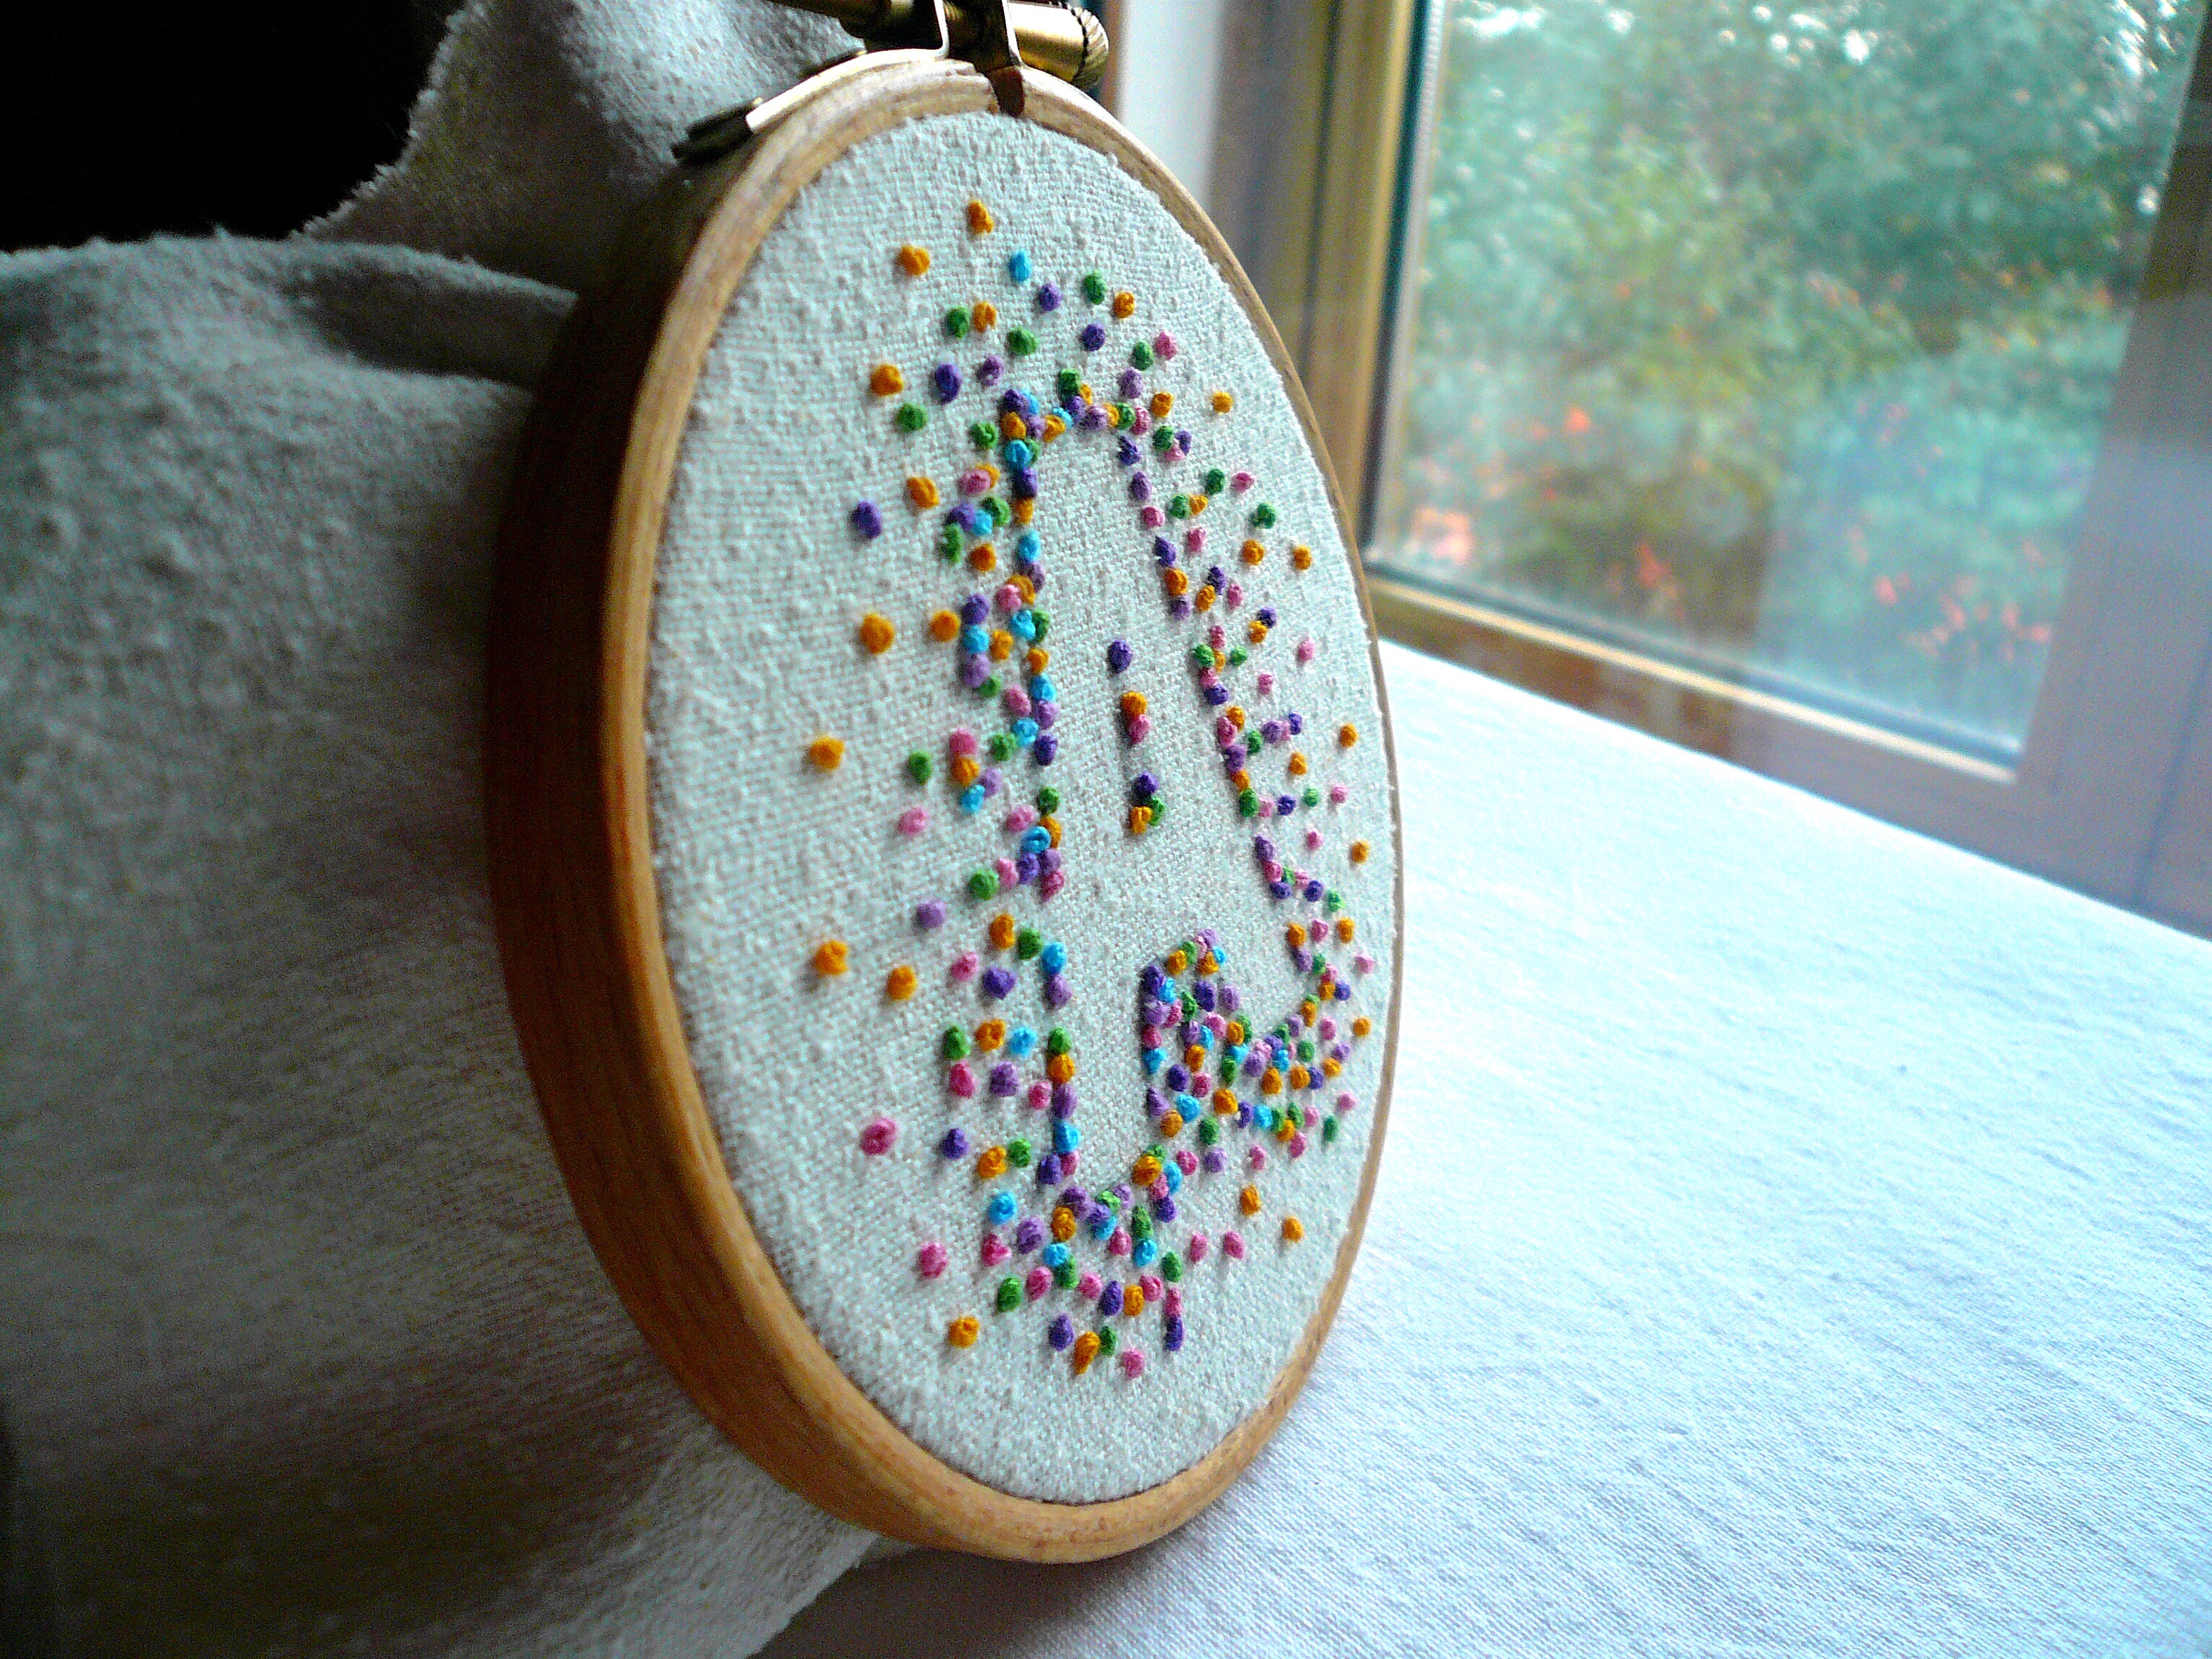
After using a few colours, your monogram will start to emerge from amongst the French Knots! Focus on working the knots towards the edge of the hoop rather than simply following the pencil lines. However, be sure to avoid pulling your floss at the back across any part of the negative space because it may show through at the front and spoil the effect. You will be surprised how few stitches you actually need to be able to see the negative shape.

Just keep working the French Knots until you have an effect you are happy with…..or until you have finished your glass of Prosecco 😉.

I really want to make one of these, it looks so effective. I love the colours you’ve used 😊
LikeLike
That is fantastic! I can’t wait to see how you get on 😘
LikeLiked by 1 person
I agree, can’t wait to try this!
LikeLiked by 1 person
Terrific! I do look forward to seeing your monogram 😘
LikeLike
I’ve decided to make one for a friend’s birthday. What sort of fabric should I look for?
LikeLiked by 1 person
Hi Kate, for some reason I can’t reply to your last message so I hope you get this. So glad you’re giving this a try – you’ve made my day! I used silk noil – I used a supplier on Etsy and can dig out the details if you need them, just send me your email. It just has to be a fabric with a nice regular, fairly close weave and a medium weight. Anything too loose weave, irregular or “slubby” will spoil the effect. The other thing to consider is the colour stitches you want to use – what backing fabric will make the best contrast. Give me a shout if there is anything else you need. I look forward to seeing it 😘
LikeLike
Thanks. I’m going to try my luck at a couple of shops near me. Will let you know if I have no success. Colour contrast is not my forte … I’m thinking of going for pinks/yellows, in which case I was thinking an ivory/cream would be OK, or would go with most colours in case I change my mind!
LikeLike
This is beautiful! Do you carry the thread underneath or would this show through the fabric? Or do you knot off after every French knot? Thanks 🙂
LikeLiked by 1 person
Thank you. I do carry the thread through to the next knot, providing it is not too far away. Once you have gone round the shape a couple of times, you can start to radiate the knots out towards the edge of the hoop. If working with multi colours, I usually find I can do four or five knots before knotting off and moving to the next area. You would be able to manage more with a single colour. The only place I avoid carrying the thread underneath is if it will cross over the negative space of the monogram – even a hint of the thread showing through underneath would spoil the effect. Happy stitching!
LikeLike
Thanks! 🙂
LikeLike
You’re right, I did fall in love with French knots!
They look amazing and I must say that I’m more than a little smitten with the exploding F!
Clever, clever You.
Fizzybee xx
LikeLiked by 1 person
Ohh! Thank you so much. Of course!! The F would be perfect for you. I made this for a little Finnlay back in the UK. Thanks so much for stopping by and commenting xxx
LikeLike